
The Nokia 9210 Communicator mail system is compliant with Internet standards
SMTP, IMAP4 (rev 1) and POP3.
To be able to receive and send mail, you need to have set up a remote mailbox
service. This service may be offered by an Internet service provider, a network
service provider, or your company.
Tip: If you press Write
mail in the main view of
Messaging and you have not
set up your mail account,
you will be prompted to do
so.
Before you can send, receive, retrieve, reply to, and forward mail on your
communicator, you must do the following:
• You must configure an Internet access point (IAP) correctly. See ‘To set up your
Internet access point’ on page 134
• You must define your Mail settings correctly. See ‘Mail settings’ on page 170.
Note: Follow the instructions given by your remote mailbox and Internet service
providers.
©2001 Nokia Mobile Phones. All rights reserved.
170
Messaging
Mail settings
Any changes you make to mail settings affect the way your mail is sent and
received.
To connect to your remote mailbox, you need to define a mail account on your
communicator:
1 Press the Menu key in the main view of the Messaging centre and select Tools
> Account settings….
2 Press Create new. A selection list of possible account types opens.
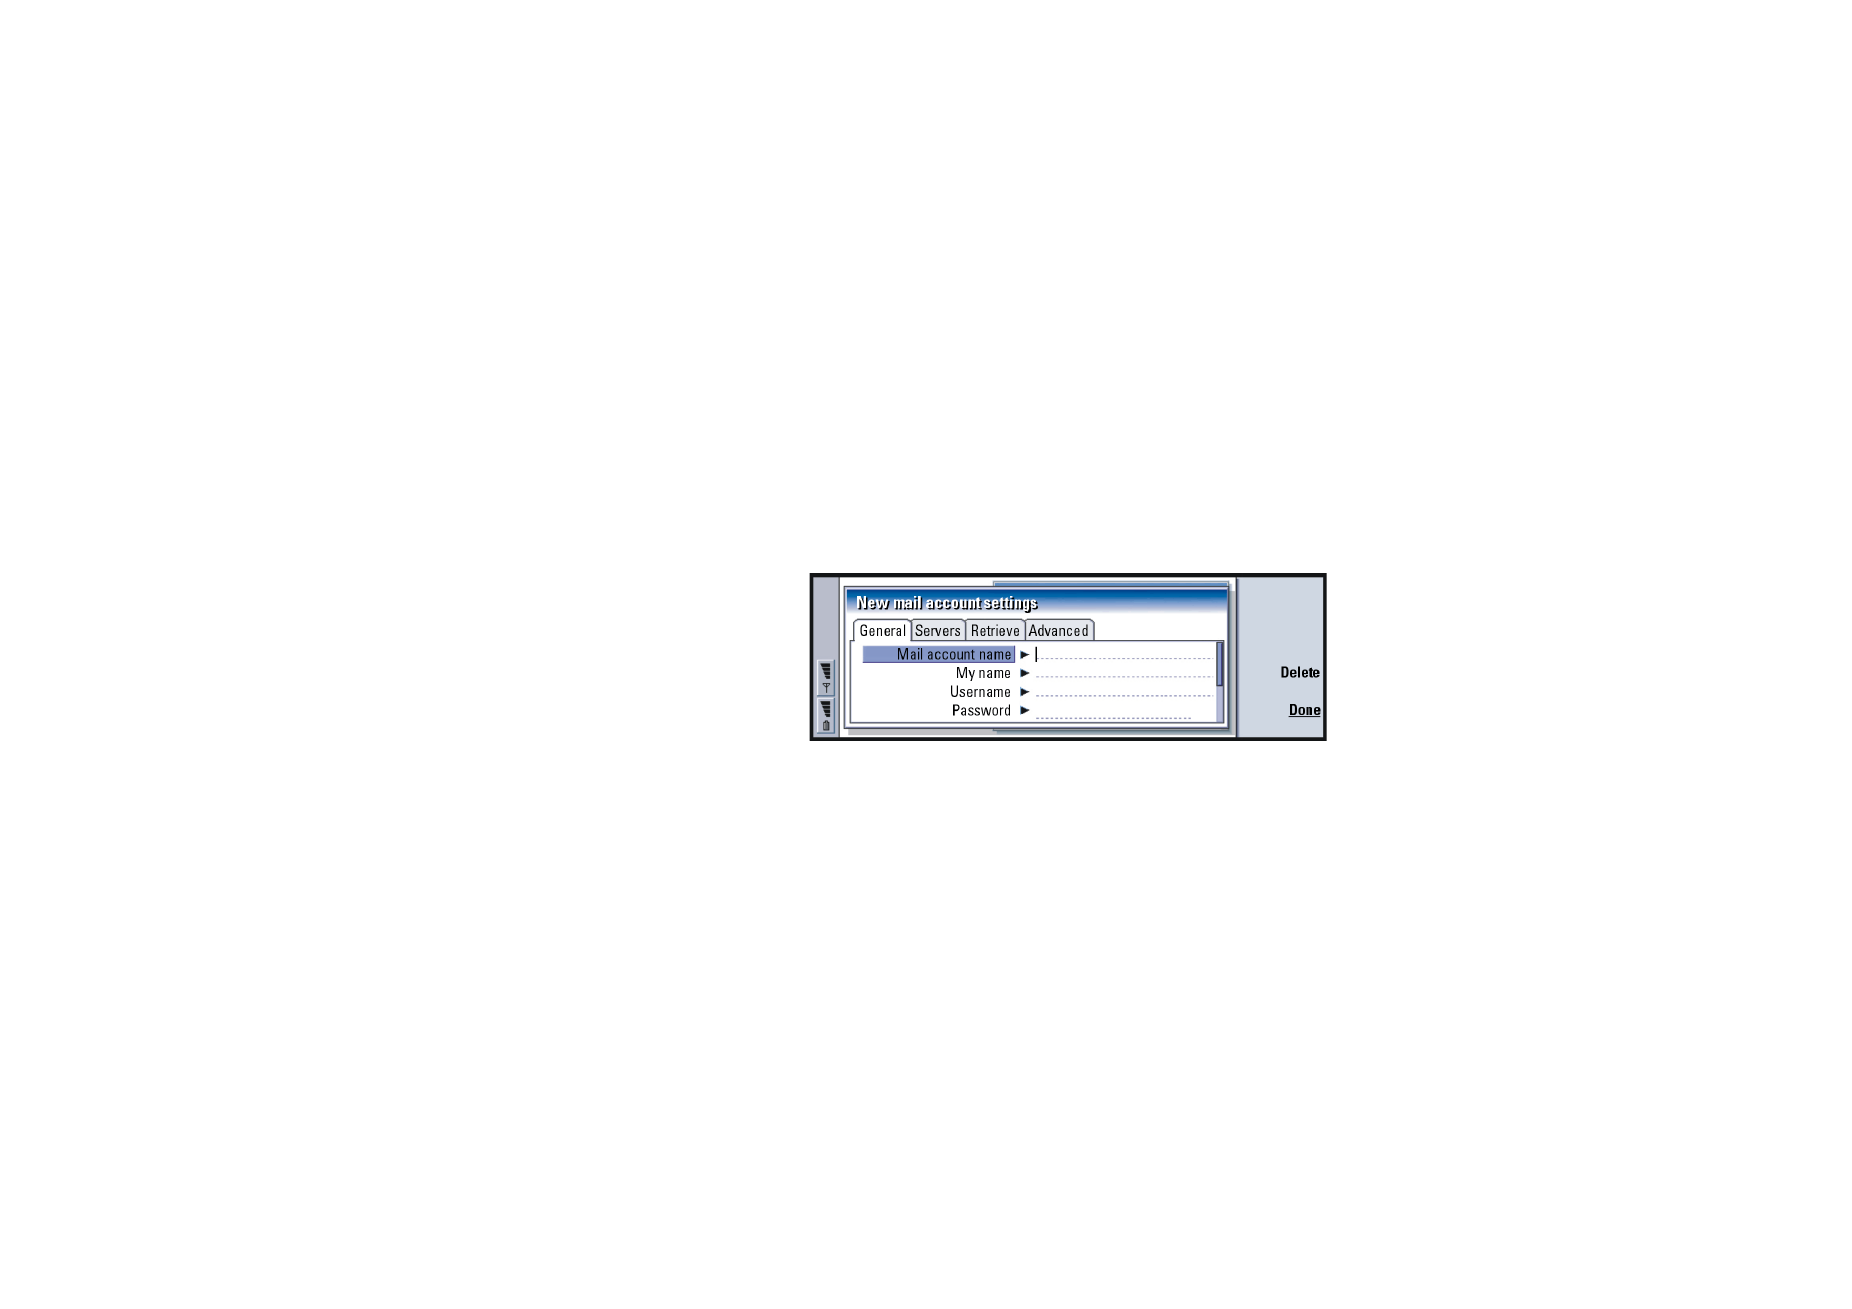
3 Select Mail and press OK. A dialog with fourpages opens. See figure 71
Figure 71
4 Define the following:
General page
Mail account name: The name of the remote mailbox. You can type here any name
to describe the mailbox.
My name: Type in your name.
Username: Type in your user name.

©2001 Nokia Mobile Phones. All rights reserved.
171
Messaging
Password: Type in your password. If you leave this field blank, you will be prompted
for password when you try to read mail in your remote mailbox.
My mail address: Type in the mail address given to you by your service provider.The
address must contain the ‘@’ character. Replies to your messages are sent
to this address.
Internet access: The IAP connection used for the mailbox. Choose an IAP from the
list. To create an IAP, see ‘To set up your Internet access point’ on page
134.
Default account: Choose a mail account from the list. When you set up an account
for the first time, it will be the default until more accounts are created.
Servers page
Mail account type: Defines the mail protocol your remote mailbox service provider
recommends. The options are POP3 and IMAP4.
Outgoing mail server: The IP address or host name of the computer that sends your
Internet mail.
Tip: Outgoing mail
servers are typically called
SMTP servers or hosts and
incoming mailservers are
called POP3 or IMAP4
servers.
Incoming mail server: The IP address or host name of the computer that receives
your Internet mail.

©2001 Nokia Mobile Phones. All rights reserved.
172
Messaging
Retrieve
Tip: If you prefer reading
your mail messages and
replying to them while
connected to your remote
mailbox, select Mail headers
(stay online). If you prefer to
retrieve the messages and
disconnect, select Messages.
Retrieve: Specifies what will be retrieved from the remote mailbox when the
connection is established. The options are Mail headers (stay online)/
Messages/Messages and attachments. The Messages option is available only
if the mailbox type is IMAP4.
Max. size of mail: The maximum size of a message which is retrieved. The minimum
is 1 KB and maximum 1000 KB.
Advanced page
Default mail type: The type of mail that you can write and send from your
communicator. The options are Plain text (no MIME)/Plain text/Formatted
text (HTML).
Send mail: How mail is sent from your communicator. The options are Immediately/
During next connection/Upon request.
Include signature: Specifies whether your signature is attached to sent mail. The
options are No/Use my contact card/Custom. If you choose Custom, you can
press Edit signature to modify the signature file.
Request read report: Specifies whether you want to receive a notification when the
recipient has opened your mail . You can only receive a notification if the
recipient’s e-mail application supports this feature. The options are Yes/
No.
Allow report requests: The options are Yes/No. If you choose No the sender of a
message you receive will not get a notification, when you open the
message.
Copy to my mail address: The options are Yes/No.
©2001 Nokia Mobile Phones. All rights reserved.
173
Messaging
Secure login (APOP): Used with POP3 protocol to encrypt the sending of passwords
to remote mail server.The options are Yes/No.
Secure connection (TLS): Used with POP3, IMAP4 and SMTP protocols to secure the
connection to remote mailbox. The options are Yes/No.
IMAP4 folder path: Define the location of the IMAP mail folder here, if not defined
automatically. This option is available only if the mailbox type is IMAP4.
To edit an account
1 Press the Menu key in the main view of Messaging and select Tools > Account
settings…. A list of accounts opens.
2 Select the account you wish to edit and press Edit.
3 Define the settings on the General, Servers, Retrieve and Advanced pages
explained above.
4 Press the Esc key to discard any changes.
Press Done to accept the changes you have made.
Note: You cannot edit mailbox settings when online.
To write and send new mail
Tip: If you cannot send
mail from your
communicator, check first
that your mail address is
correct in Mail settings. See
page 170.
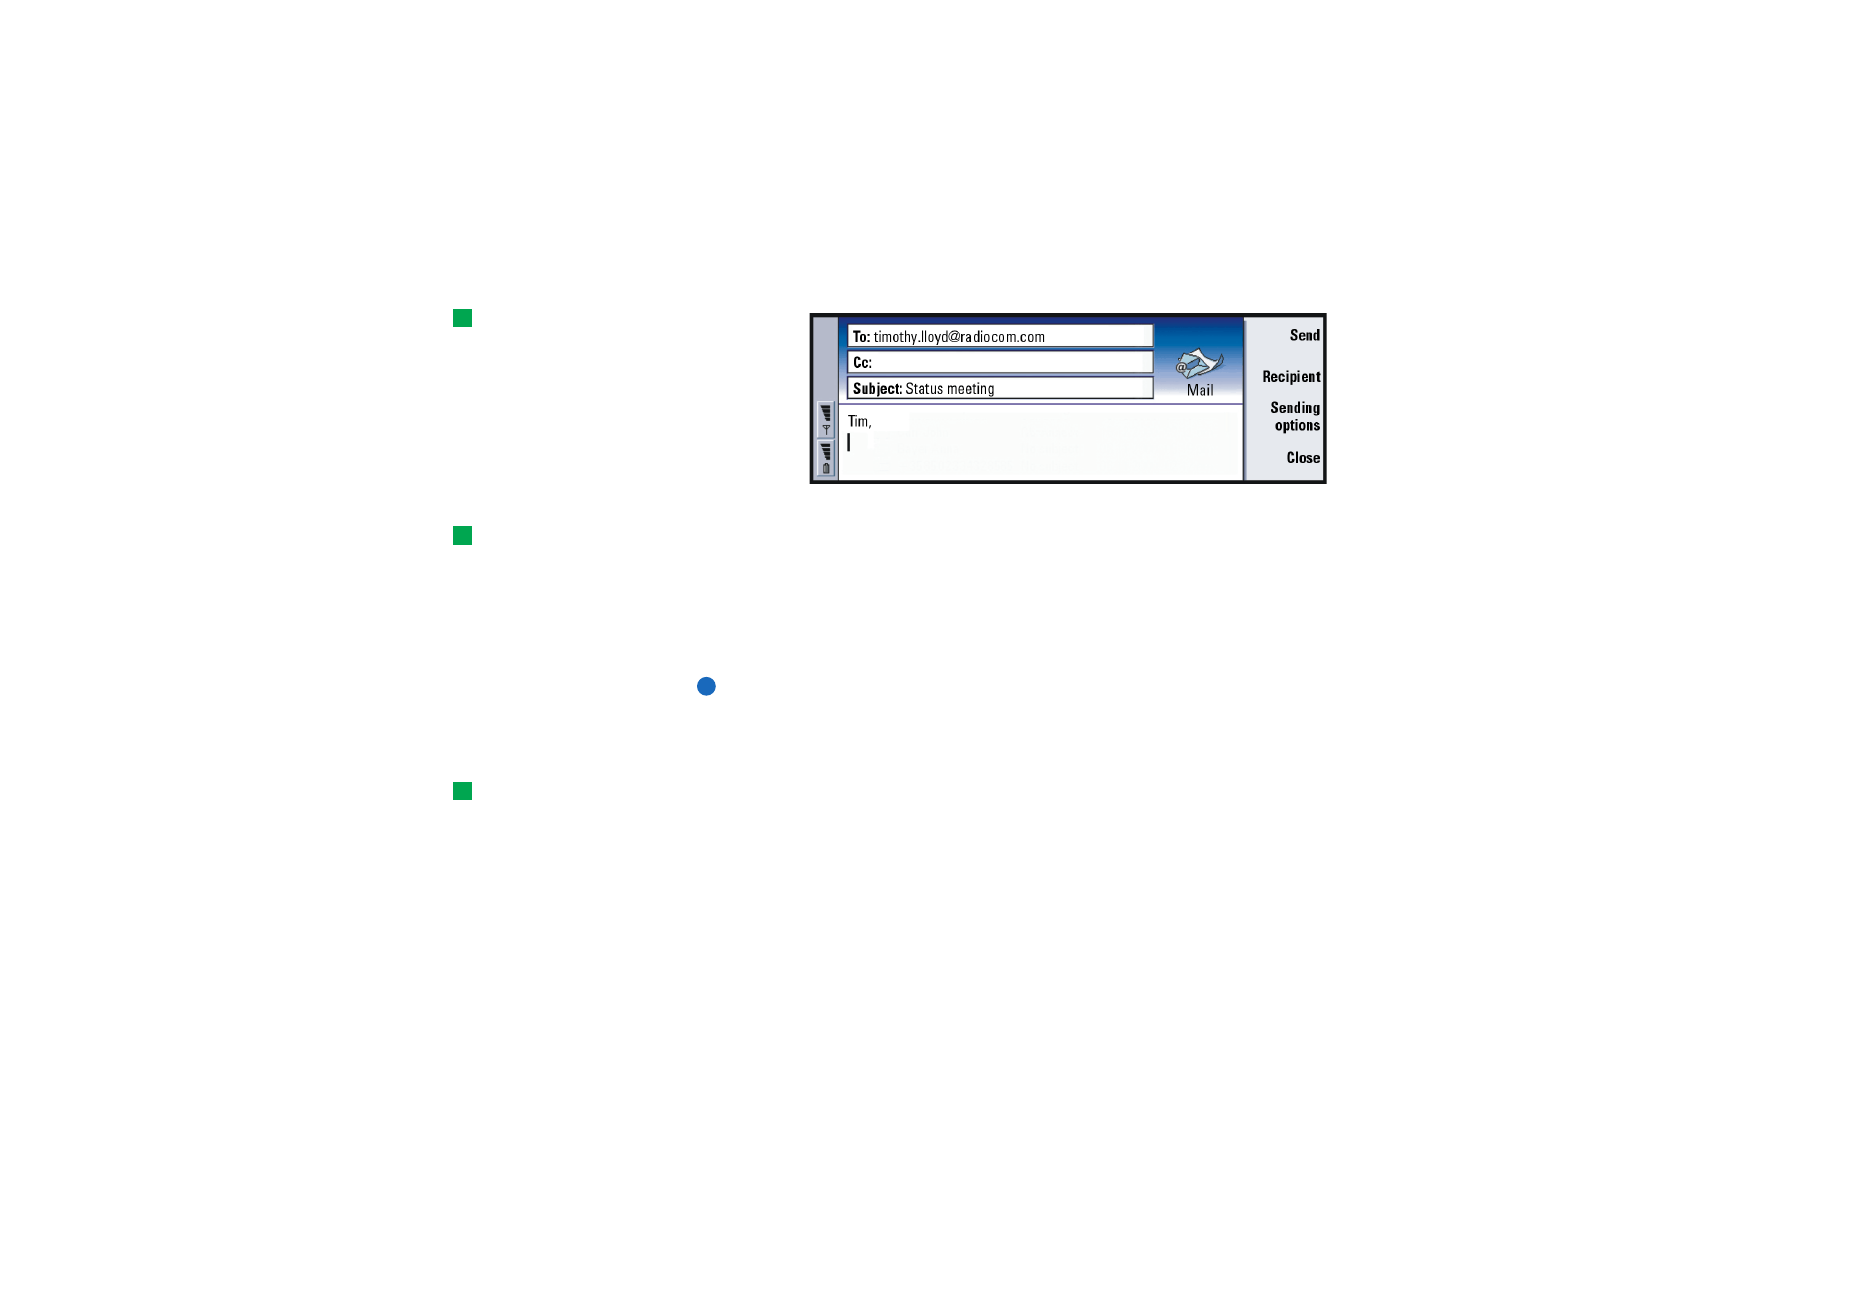
1 Press Write mail in the main view of Messaging. The mail editor opens, see
figure 72.
©2001 Nokia Mobile Phones. All rights reserved.
174
Messaging
Tip: You can zoom in the
mail editor.
Figure 72
2 Write the mail message.
Tip: To see how to select
recipients, see page 163.
3 Press Recipient to select the recipient or recipients of the message, or
type in the name or mail address into the To:, Cc: and Bcc: fields. You can move
from one insertion field to another by pressing the Tab key.
4 If you wish to adjust the sending options of the mail message, press Sending
options. A dialog with two pages opens, see page 175.
5 Press Send.
Note: You cannot enter accented characters, such as é or ä, into mail addresses.
Recipients
There are three hierarchy levels of recipients in a mail message:
Tip: To hide or show Cc:
and Bcc: fields in the mail
editor, press the Menu key
and select View > Show Cc
field or Show Bcc field.
To: - Message is sent directly to the recipient.
Cc: - A copy of the message is sent to the recipient, and the recipient’s name is
visible to other recipients of the message.
Bcc: - A copy of the message is sent to the recipient, but the recipient’s name is
not visible to other recipients of the message.

©2001 Nokia Mobile Phones. All rights reserved.
175
Messaging
Note: The addresses you have entered are checked against your contacts
database once you press Send. Names which do not match with the
contacts database, or addresses which do not have ‘@’, should be
removed from the address fields.
If a name you have entered in one of the address fields matches a group name, the
name is replaced with the mail addresses of the group members.
Style of sent mail
You can format only HTML messages. Press the Menu key and select Format >
Formatting. This opens the following options for formatting: Bold, Italic, Underline
and Bullets.
Tip: To format the font
for a selected text area,
press the Menu key and
select Format > Font….
To set a preferred font for plain text and HTML mail, press the Menu key and select
Tools > Preferences….
To align a mail message, press the Menu key and select Format > Alignment. This
opens the following options: Left, Centre and Right.
Sending options
Tip: In the case of PC
mail message (see page
181), Priority and Mail
account in use are the only
options you can change.
The options in the Sending options dialog contain values set in mail settings, as
explained on page 170. Press Sending options to open the dialog. Any changes you
make in this dialog affect only the current mail message you are about to send.
Note: Changing the options in the Sending options dialog affects the format of
message when it is opened by the recipient. For example, the format may
affect the legibility of the characters.

©2001 Nokia Mobile Phones. All rights reserved.
176
Messaging
Message page
Priority: The priority of a message. The options are High/Normal/Low.
Message type: The type of the message. The options are Plain text (no MIME)/Plain
text/Formatted text (HTML).
Request read report: Specifies whether to add to the outgoing mail, a request for
you to receive notification, if the recipient has opened your mail.
Delivery page
Mail account in use: The remote mail service which is used for sending this
message.
Note: Changing the mail account does not change the default options in other
fields of this page.
Send mail: When the message will be sent. The options are Immediately/Upon
request/During next connection.
To retrieve mail
Tip: Delete mail regularly
from your communicator to
free up memory space. For
more information, see ‘To
avoid low memory’ on page
164.
Mail addressed to you is not automatically received by your communicator, but by
your remote mailbox. To read your mail, you must first connect to the remote
mailbox and then select the messages you wish to retrieve into your
communicator. Connection to a remote mailbox is established via a data call.
To connect to a remote mailbox
1 Select the remote mailbox in the left frame of the main view of Messaging.
©2001 Nokia Mobile Phones. All rights reserved.
177
Messaging
Tip: If you do not specify
a password when initially
connecting to the remote
mailbox, a dialog opens.
Type in the password and
press OK.
2 Press Retrieve mail.
3 When the connection to the remote mailbox has been established, press the
Menu key and select Retrieve > New or Selected or All mail.
4 When all the mail you have requested is retrieved, press Go offline.
Note: Pressing Go offline does not necessarily disconnect the phone, if there
are other applications open that use the connection. Press the Menu key
and select File > Disconnect to hang up.
To subscribe and unsubscribe to remote mailbox folders
If your remote mailbox is of IMAP4 standard, you can edit and synchronise remote
inbox folders in your communicator. To do this, you need to subscribe to the folders
and make them visible in your communicator.
Tip: To create new folders
in your remote mailbox, go
online, press the Menu key
and select File > Folder. You
can now choose whether to
Create new folder… or
Rename folder….
1 Go online.
2 Press the Menu key and select Receive > Folder subscriptions…. A list of folders in
the remote mailbox opens.
3 Select the folder.
4 Press Subscribe. If you have already subscribed to the folder, press Unsubscribe
to cancel the subscription.
5 Press Go offline and Go online to include the new subscribed folders in the list.
To read mail
You can read, reply to and forward mail in the mail viewer.
To read received messages, select the message in the Inbox and press Open.
The mail viewer shows the message in a read-only state, which means that you
cannot edit it or the attachments linked to it.

©2001 Nokia Mobile Phones. All rights reserved.
178
Messaging
If there is a Web link in the message, you can open it by going to that link and
pressing Use.
Tip: You can create new
contacts from the other
recipients of a received mail;
press the Menu key and
select Tools > Add to contacts.
If there is a fax, mail or short message link in the message, you can write a fax,
mail or short message by selecting the URL and pressing Use. This opens the
appropriate editor where the recipient field is completed using the fax, mail
address or GSM number in the link.
To delete the message, press Delete.
WARNING! Messages marked as deleted when offline will also be deleted
from the remote mailbox server, when online. To delete local mail
messages without deleting remote mailbox files, see ‘To avoid low
memory’ on page 164.
To reply to mail
1 Select the mail message in Inbox and press Open. The mail viewer opens.
Tip: To forward mail,
press the Menu key and
select File > Forward.
2 Press Reply. The mail editor opens.
If you wish to reply to all the recipients, not just the sender of the mail message,
press the Menu key and select File > Reply to > All recipients.
Tip: To search and
replace text in a mail, press
the Menu key and select Edit
> Find….
3 Edit the message in the mail editor and press Send.
Note: When replying to a mail message, HTML messages are included as
attachments.
Style of replied to, and forwarded mail
You can edit the style of replied to, and forwarded mail.
1 Press the Menu key and select Tools > Preferences…. A dialog opens.
2 Define the following:
©2001 Nokia Mobile Phones. All rights reserved.
179
Messaging
Include message in reply: Whether or not the original message is included in the
reply to the message. The options are Yes/No.
Plain text font: Defines the font used in plain text messages.
HTML normal font: Defines the default font size and family used in HTML messages.
Note that HTML messages may contain tags that change what you set in
this option.
Mail attachments
You can send most documents and messages you write in the other applications
of your communicator, such as in Word, as mail attachments.
WARNING! Mail attachments may contain viruses or they can otherwise be
harmful to your communicator or PC. Do not open any
attachment, if you are not sure of the trustworthiness of the
sender. For more information, see ‘Certificate management’ on
page 218
To add mail attachments
Tip: To edit mail
attachments, press the
Menu key and select
Attachments > Edit. You
cannot edit attachments in
received mail messages.
1 Press the Menu key in the mail editor and select Attachments > Insert file….
2 Search and select the file you wish to attach to the mail.
To view and save mail attachments
Attachments always appear at the bottom of an open mail message.
You can view the attachments using the appropriate viewers, if available.

©2001 Nokia Mobile Phones. All rights reserved.
180
Messaging
Tip: To open an
attachment for viewing,
select it with the Arrows key
and then press Enter.
1 Open the mail message containing attachments and press Attachments. A
dialog opens.
2 Press Open to open the attachment for viewing.
Press Save to save the attachment.
Press Delete locally to delete the attachment from your communicator; the
attachment is not deleted from your remote mailbox.
Working online and offline
Working online means working with your communicator connected to a remote
mailbox via Internet connection.
When you work offline which means that your communicator is not connected to
a remote mailbox, you can delete only messages, not folders. When online, you can
delete, rename or create new folders in your remote mailbox.
Note: Any changes you make in the remote mailbox folders while offline take
effect in your remote mailbox the next time you go online and
synchronise. For example, if you delete a mail message from your
communicator when offline, the message will be deleted from the
remote mailbox the next time you connect to the mailbox.
If you want to delete a message from your communicator to save memory, see ‘To
avoid low memory’ on page 164.
Managing your mail offline enables you to save in connection costs and work in
conditions that do not allow data connection, such as on aircraft. For information
about using communicator on an aircraft, see ‘Flight profile’ on page 92.
Remember also relevant warnings, see ‘Important Safety Information’ on page 249.

©2001 Nokia Mobile Phones. All rights reserved.
181
Messaging
PC Mail
Whereas you can send and receive Internet mail over a data call, you cannot send
PC mail from the communicator. PC mail is mail you can read, write and edit on
your communicator, but which you can send and receive only through a PC, the
next time you synchronise your communicator with the PC.
Mail synchronisation with your PC
Synchronisation is the process of making the contents of your mail messages and
mail folders identical on both your communicator and your PC. This is done by
copying and combining information between the two machines. For more
information, see PC Suite Guide on the sales package CD-ROM.
Tip: Before you can
syncronise your mail, you
must install PC mail
software from the sales
package CD-ROM . See ‘To
install software from the
CD-ROM’ on page 34.
Mail synchronisation copies the messages between your communicator and your
PC E-mail program to allow you use either machine for reading and replying to
messages.
You can convert Internet mail to PC mail so that it is synchronised with a PC, or
convert PC mail to Internet mail so that it can be sent directly from the
communicator. All synchronisation settings are defined on the PC. The only setting
you can do on your communicator is to delete the account you are using.
To create new PC mail
Note: You need to have set a mail account on your remote PC to be able to
create new PC mail.
1 Press the Menu key in the main view of Messaging and select Write > New
message…. A selection list appears.
2 Select PC mail and press OK.

©2001 Nokia Mobile Phones. All rights reserved.
182
Messaging
If you have more than one PC account, a dialog opens indicating which PC
account will be used when sending the PC mail. Select the PC account and press
OK.
3 Write the PC mail in the mail editor.
To convert to PC or Internet mail
Tip: You can view and
edit PC mail just like
Internet mail on your
communicator.
Note: HTML messages cannot be converted since PC mail does not support the
sending of HTML messages. You must change the message type to plain
text or non-MIME type in the Sending options dialog, before you can
convert the message to PC mail. See page 175 for more information.
PC and Internet mail appear together in the folders.
1 Select the mail message or messages you wish to convert.
Tip: PC mail is
distinguished from Internet
mail by a different icon.
2 Press the Menu key and select Tools > Convert to internet mail or Convert to PC
mail, depending on the type of mail you wish to convert.
3 If there are multiple PC mail or SMTP services defined, a selection list of
available services defined in the messaging server will be shown. Select the
service and press Convert.
Note: You can convert several mails at the same time, but make sure that the
mails are of the same type, either Internet or PC mail.
©2001 Nokia Mobile Phones. All rights reserved.
183
Messaging
Short Message Service
Tip: Your service provider
may send you smart
messages in the form of
short messages; these
messages may include, for
example, configuration
settings. For details, contact
your service provider.
The Short Message Service (SMS) enables you to send and receive short messages
over the digital wireless network.
Short messages can be sent or received even during voice, data, and fax calls.
Messages can be read in any mobile phone that has the capability. If the receiving
phone is switched off at the time of sending, the short message centre continues
to attempt to send the message until the validity period allowed by the network
expires.
Note: If you want to send text you have written or edited in another application
as a short message, all embedded objects or any rich formatting will be
lost. You cannot send attachments as short messages, either.
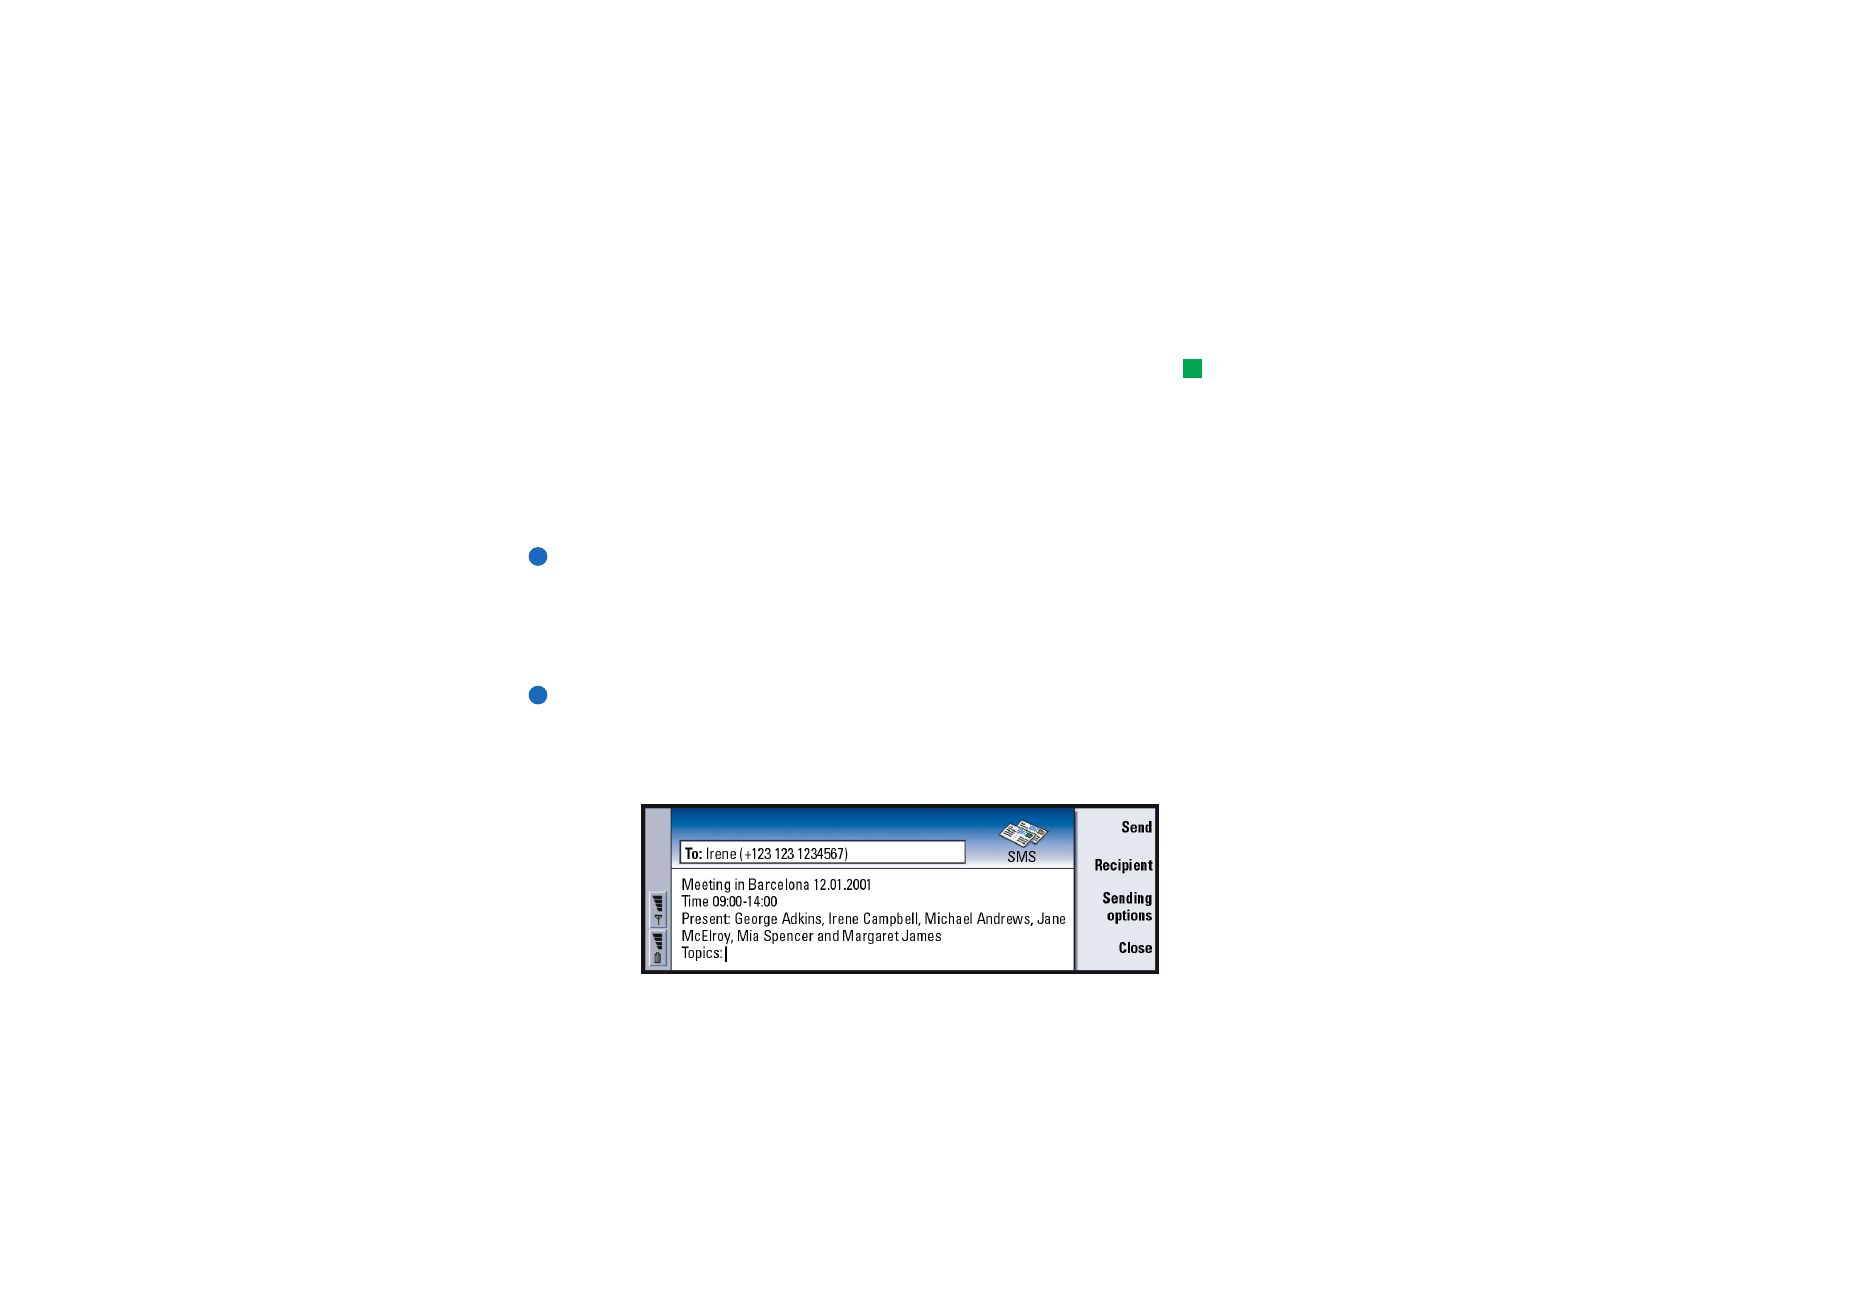
To write and send a new short message