
Views
Tip: You can press the
Calendar application button
repeatedly to cycle the view.
The Calendar consists of seven views. The purpose of each view is to help you
organise your calendar so that you manage your time effectively on a daily, weekly,
monthly, and yearly basis. You can customise the display of each view.
Commands in all views
Tip: In most of the views
you can go to today’s date
by pressing the Space key on
the keyboard.
The following command buttons are available in all of the views:
©2001 Nokia Mobile Phones. All rights reserved.
121
Calendar
Edit - Opens a selected calendar entry for editing.
New entry - Enables you to create a new calendar entry if there are no entries for
taht day . You can also create a new calendar entry by just starting to enter
characters on the keyboard, see ‘To create new calendar entries’ on page 114.
Change view - Opens a selection list from which you can switch to any of the other
calendar views. The options are Month/Week/Day/Task lists/Weekly time schedule/
Year schedule/Anniversaries.
Go to date- Opens a search dialog from which you can, by typing in the desired
date, switch to any date in the calendar. Enter the date and press OK. Press Today
to go to today’s date. Press Browse to browse through the calendar.
Month view
Figure 43
©2001 Nokia Mobile Phones. All rights reserved.
122
Calendar
Left frame
Tip: To edit an event, the
right frame must be active.
If you are in the left frame,
go to the desired date and
press the Enter key. The
focus moves to the right
frame.
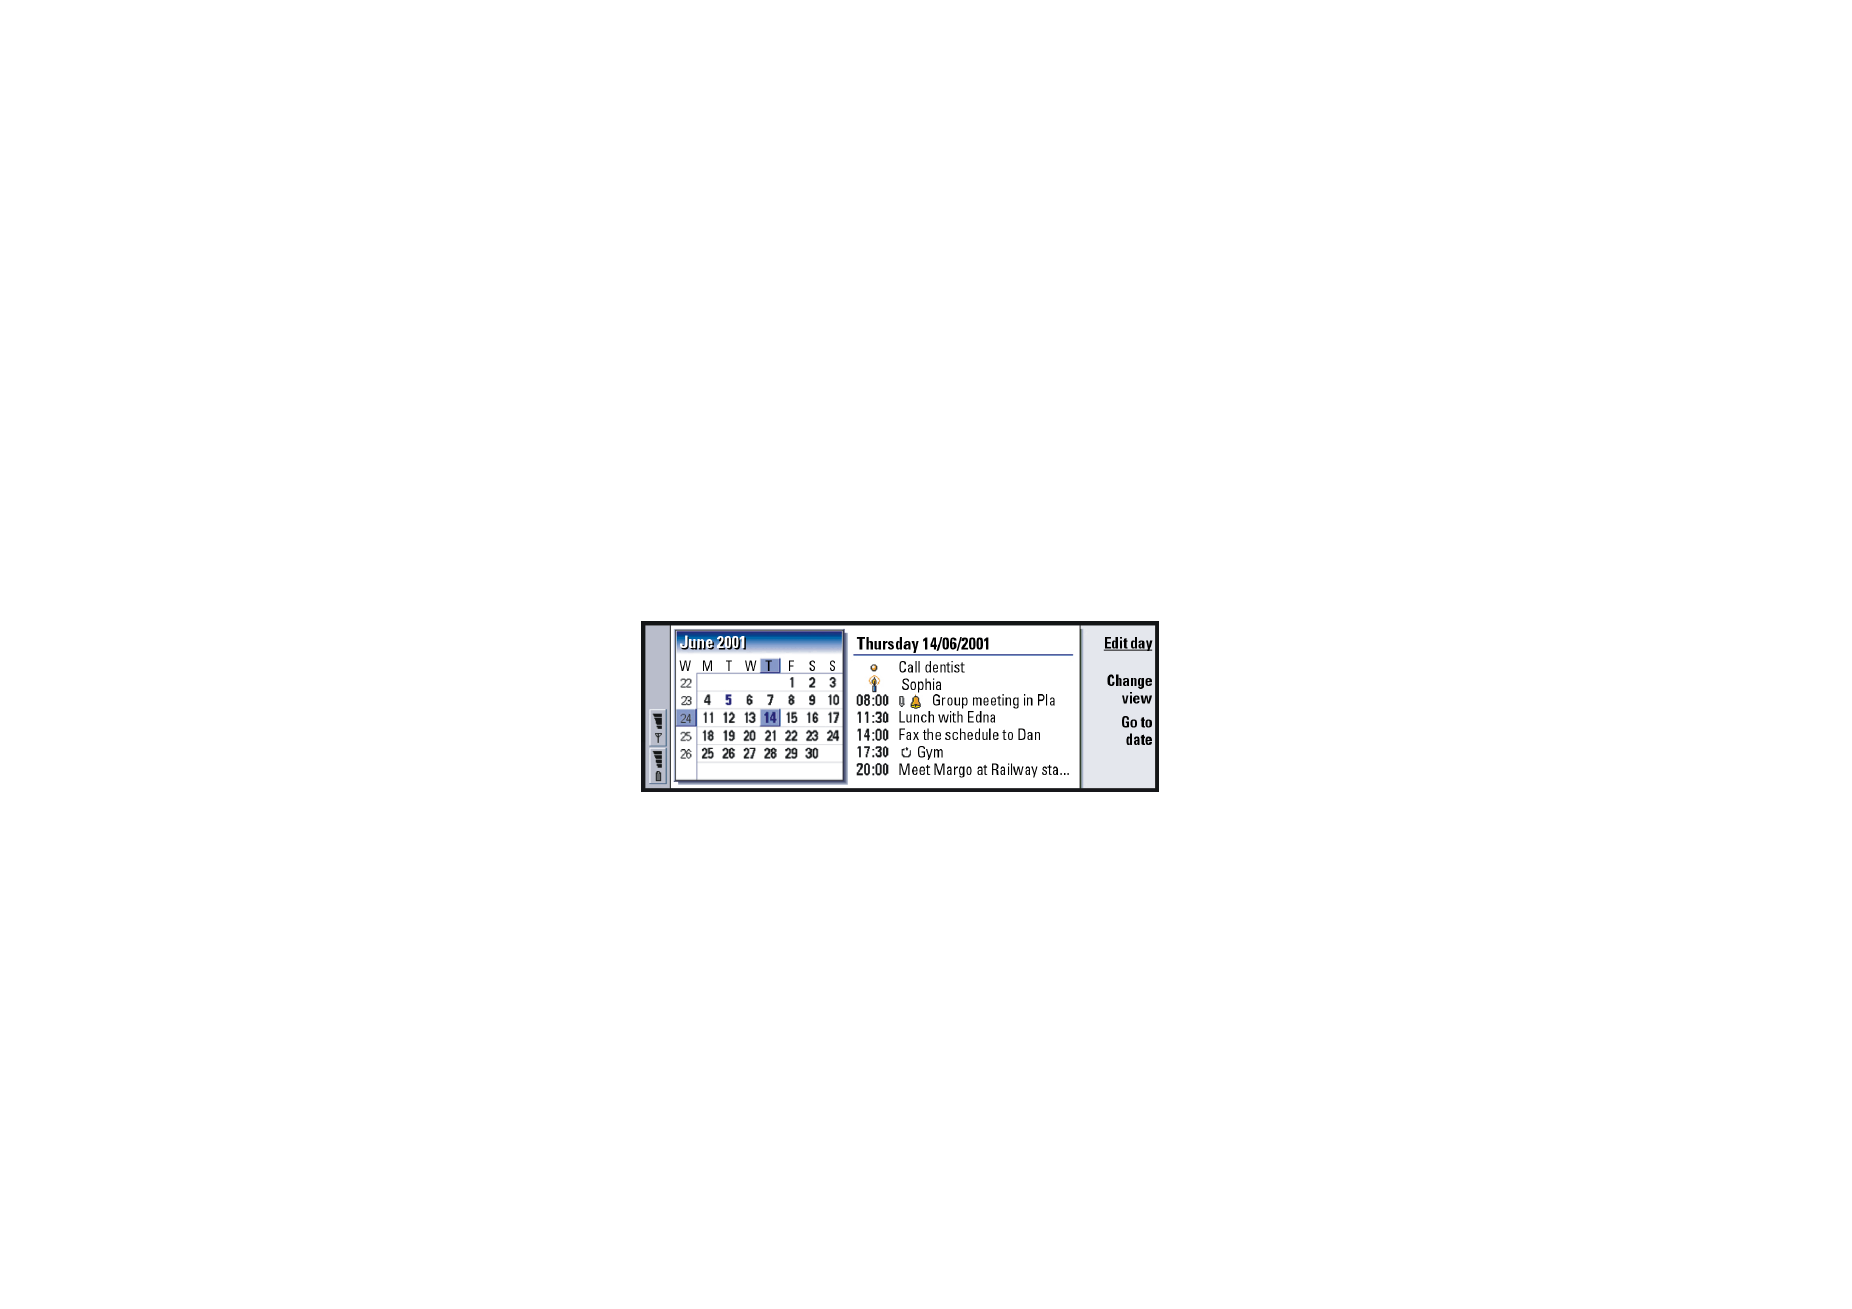
One row in the day table equals one week. Abbreviations for the days of the week
are in the highest row.
Today’s date is marked in green.
Dates that have scheduled events are marked in bold and blue.
The currently selected date is highlighted.
Right frame
Tip: To see a list of icons
that are displayed in all
views, see page 127.
The events of the currently selected date are shown in the day details frame on the
right.
Week view
Tip: To change the
starting day of the week,
press Extras, open the
Control panel, and select
Regional settings. Choose
Date page and then First day
of the week.
Figure 44
©2001 Nokia Mobile Phones. All rights reserved.
123
Calendar
Tip: To move the position
of the title box from left to
right, press the Menu key
and select View > View
settings…. See Title location in
‘View settings’ on page 131.
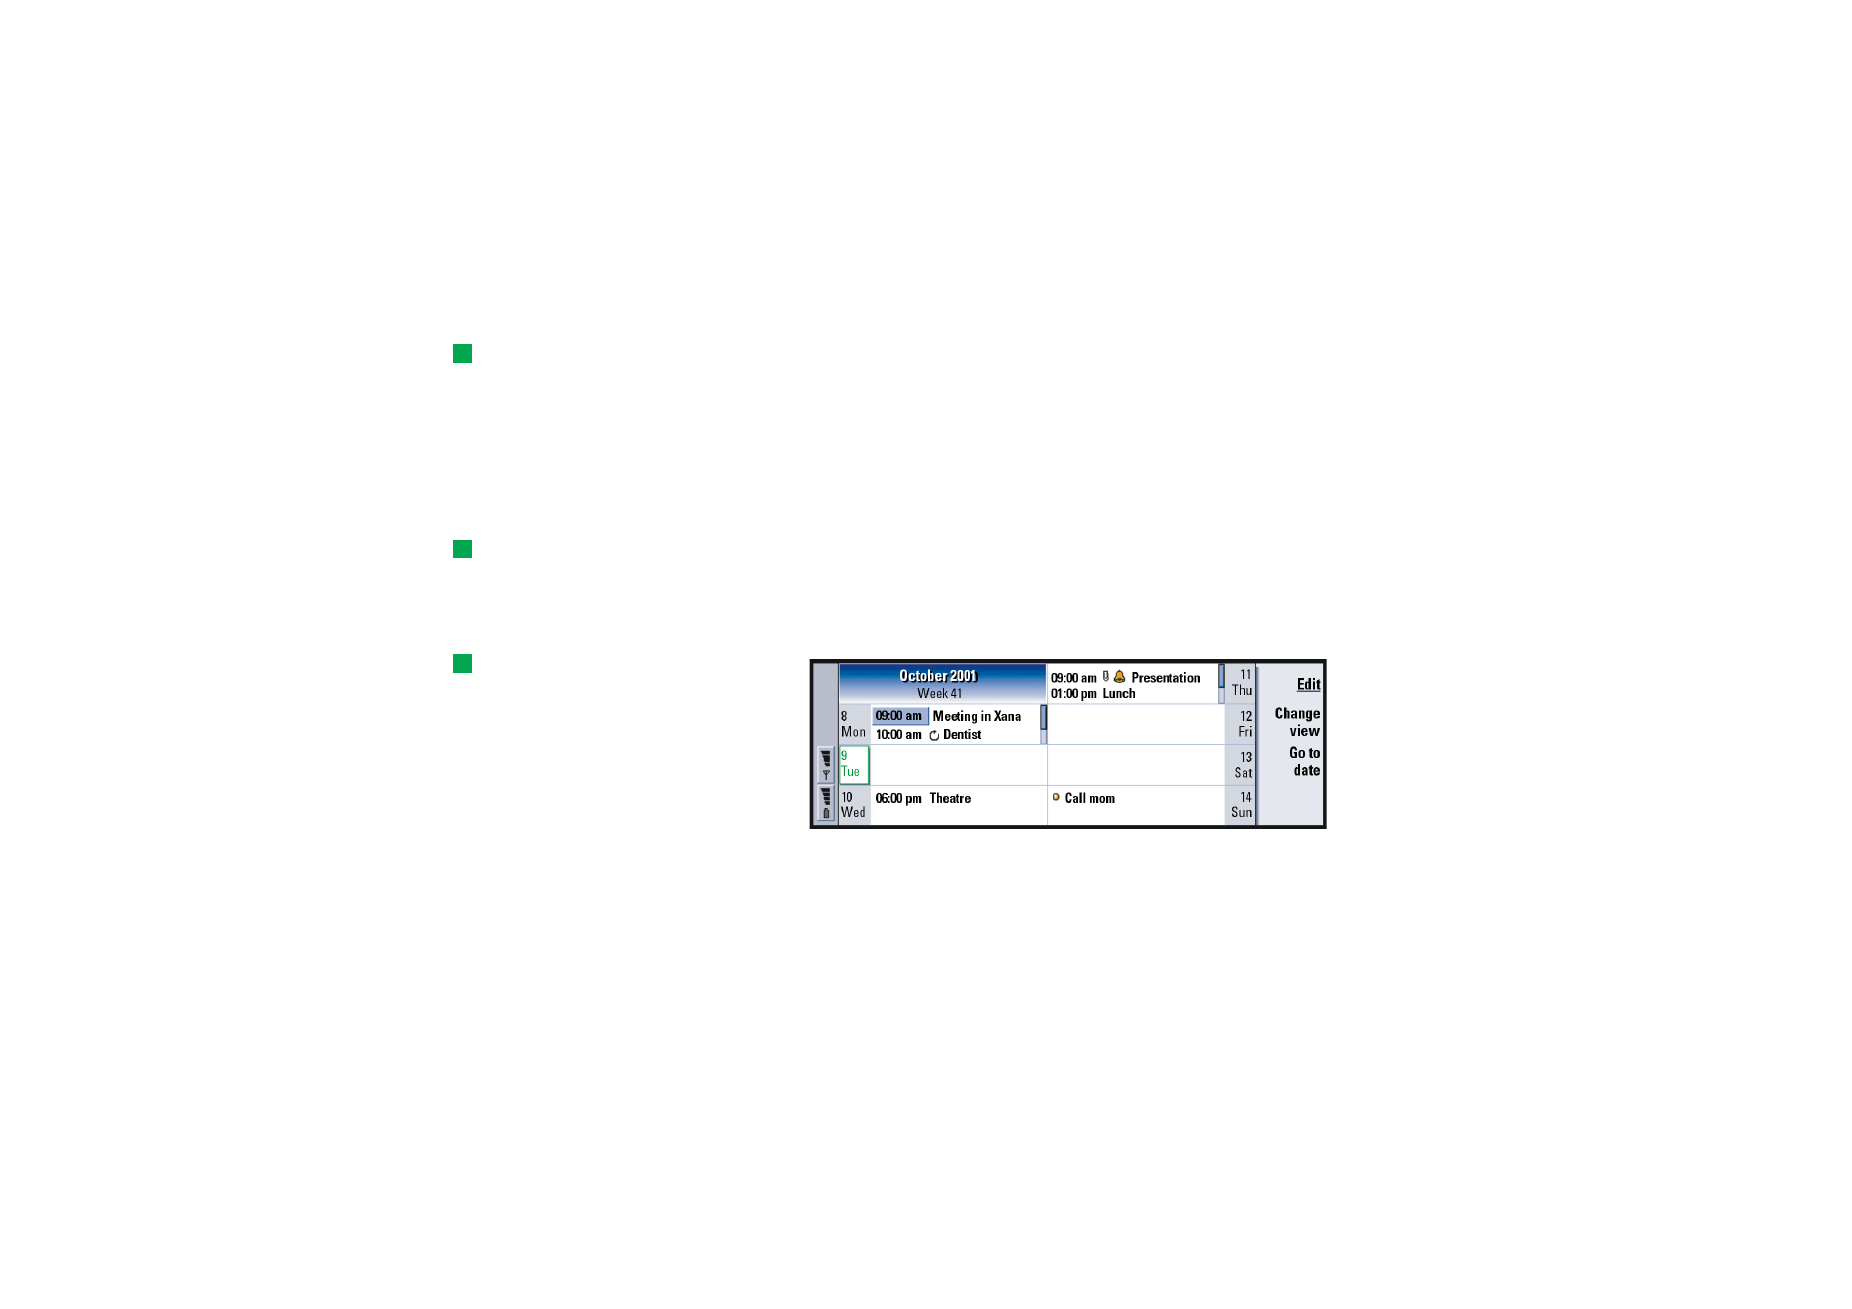
The week view shows the events for the selected week in seven day boxes.
The coloured indicator area next to a day box shows the date and name of the day.
The indicator area of the currently selected day is framed green.
Day view
Figure 45
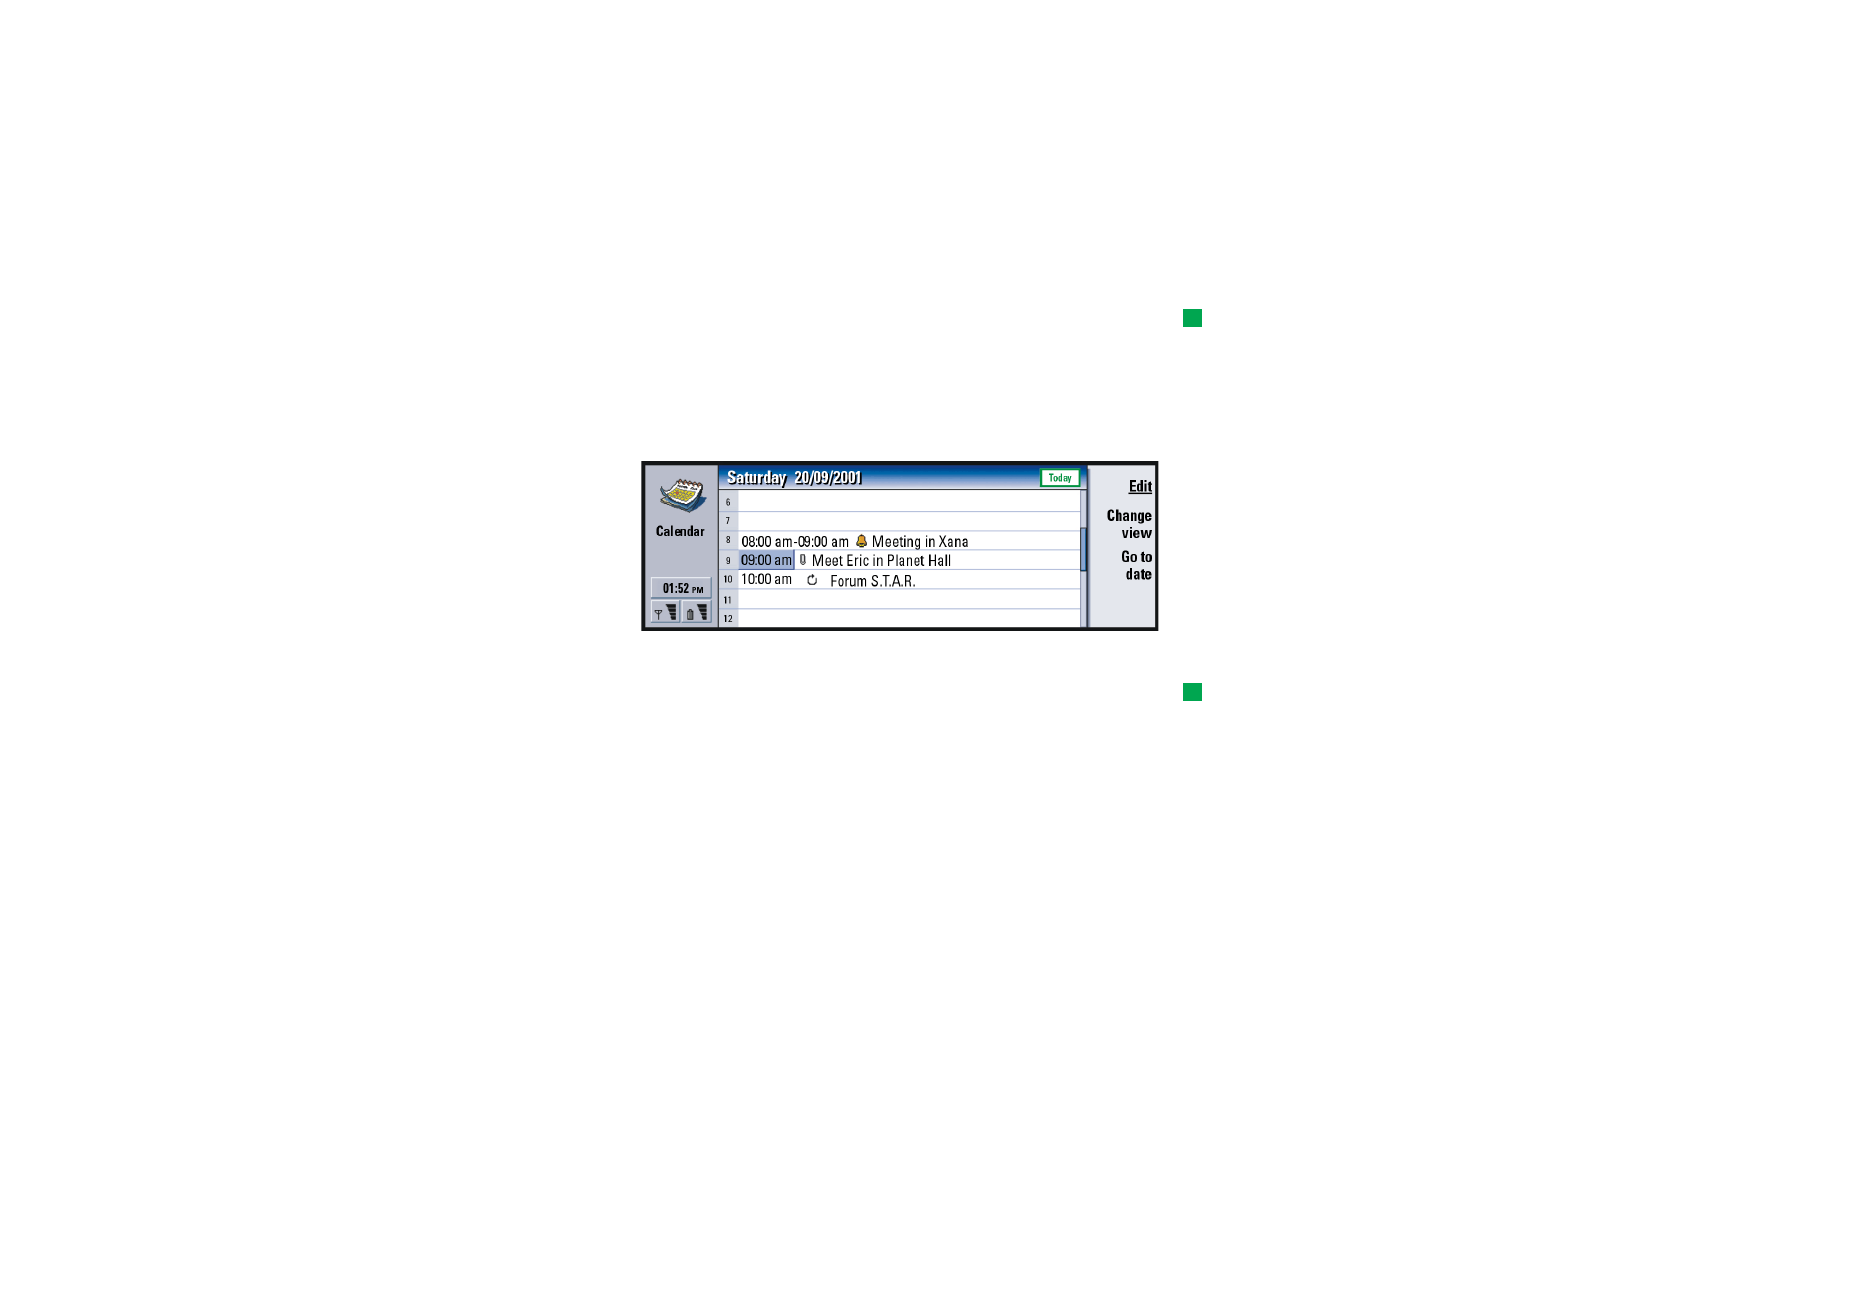
The day view shows the events for the selected day.
Tip: To change the time
period covered in one time
slot, press the Menu key and
select View > View settings….
See Time slot allocation in
‘View settings’ on page 131.
Events are grouped into one time slot according to their starting time.
To view the day view of the previous day, press < on the Arrows key. To view the
next day, press >.
©2001 Nokia Mobile Phones. All rights reserved.
124
Calendar
Tip: In day and week
views, you can quickly move
to a different date by
pressing the Tab key,
selecting the desired date
with the Arrows key, and
pressing Enter.
Task lists
Figure 46
Tip: To see how to-do
task lists are created, see
page 128.
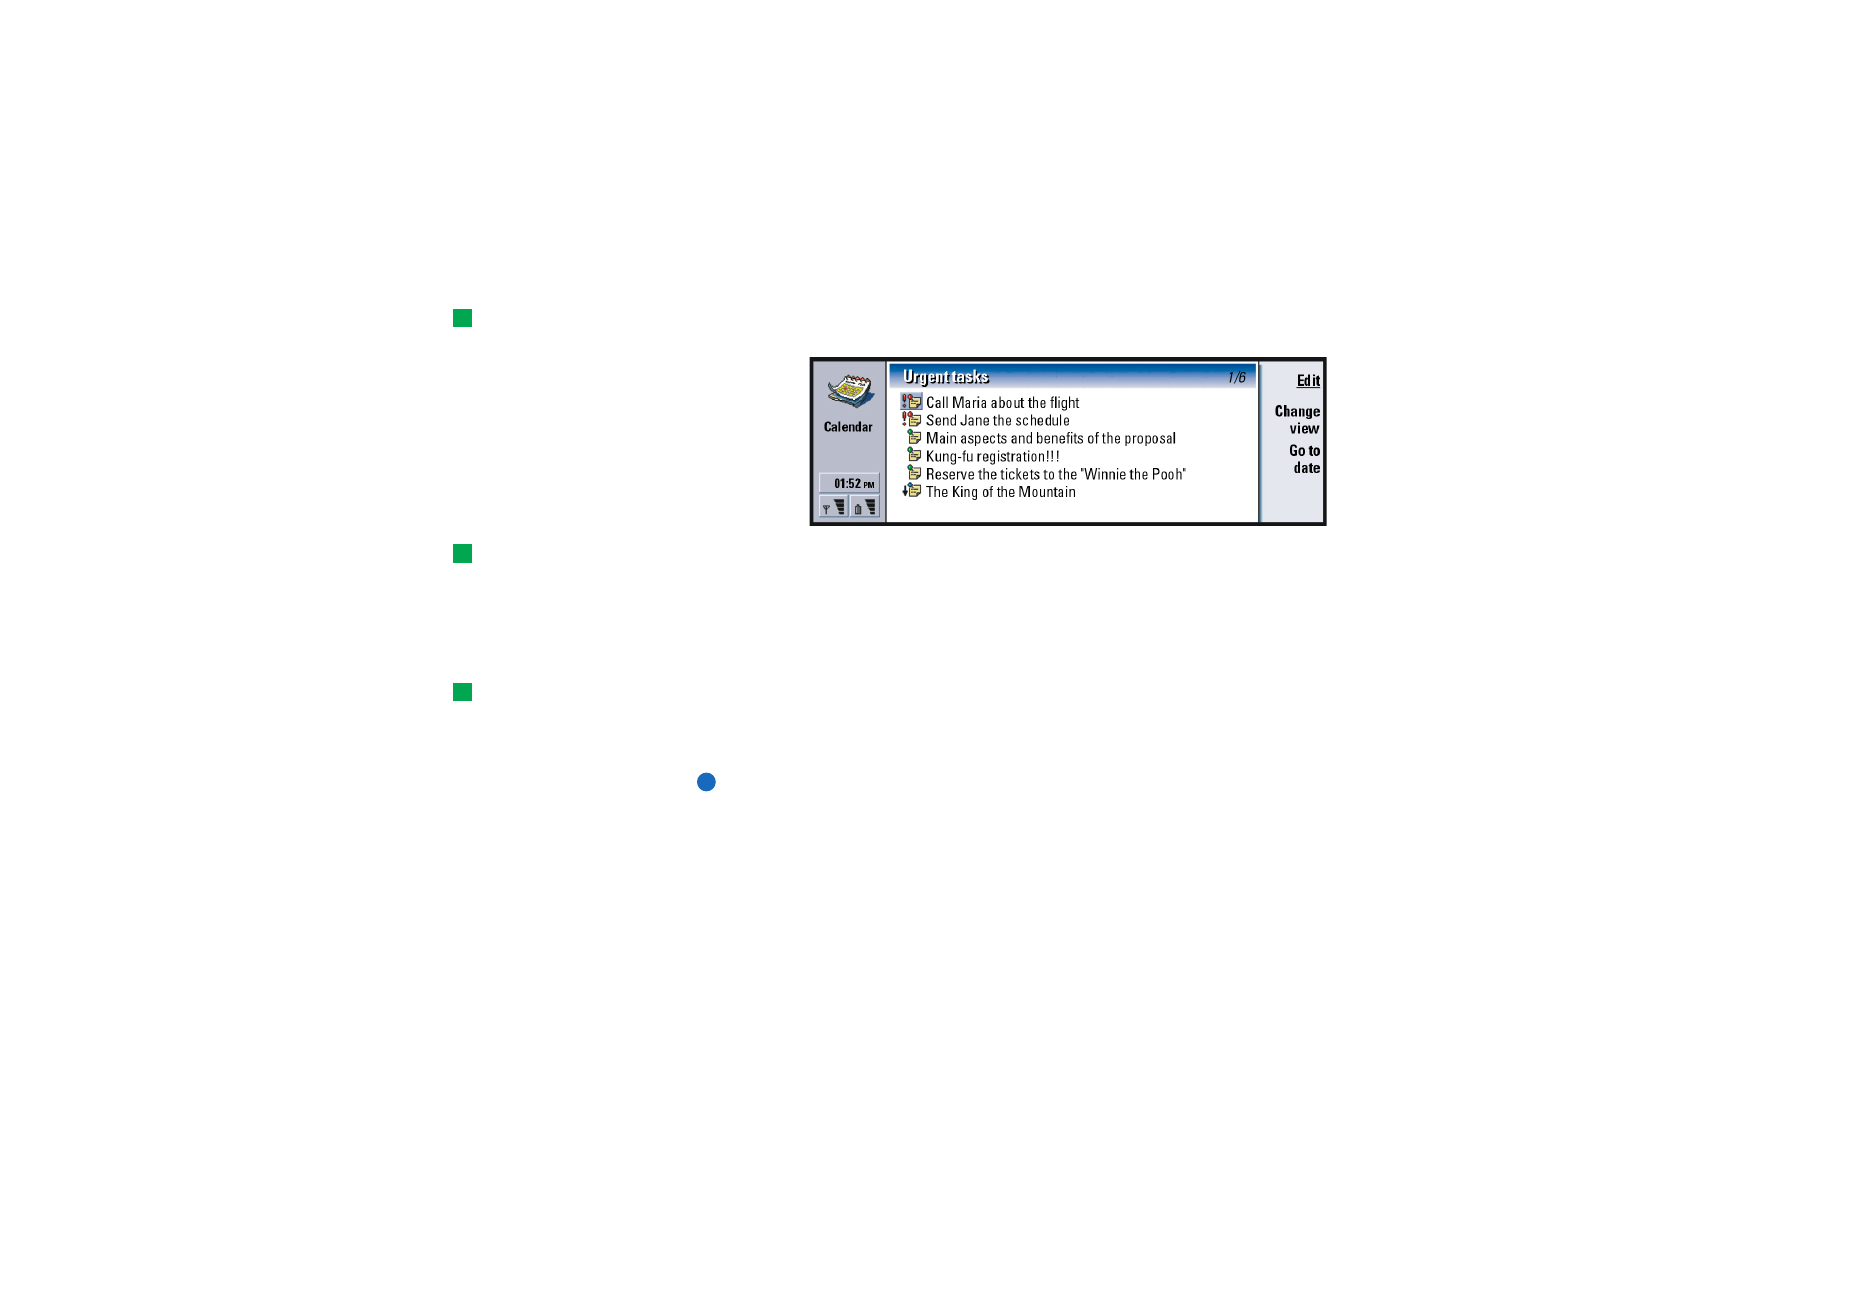
You can create one or several business or personal task lists which may contain
tasks with or without deadlines. You can also set an alarm or a repeat for a task.
The page number in the upper right corner of the Task list view indicates the
position of the task list among the other task lists. For example, in Figure 46, ‘1/5’
means that there are altogether five task lists and ‘Urgent tasks’ is the first list.
Tip: To see a list of all
task lists, press the Tab key.
To view the previous task list, press < on the Arrows key. To view the next task list,
press >.
Due dates are shown to the right of a task, in brackets.
Note: Only to-do task entries are shown in the task list.
©2001 Nokia Mobile Phones. All rights reserved.
125
Calendar
Weekly time schedule
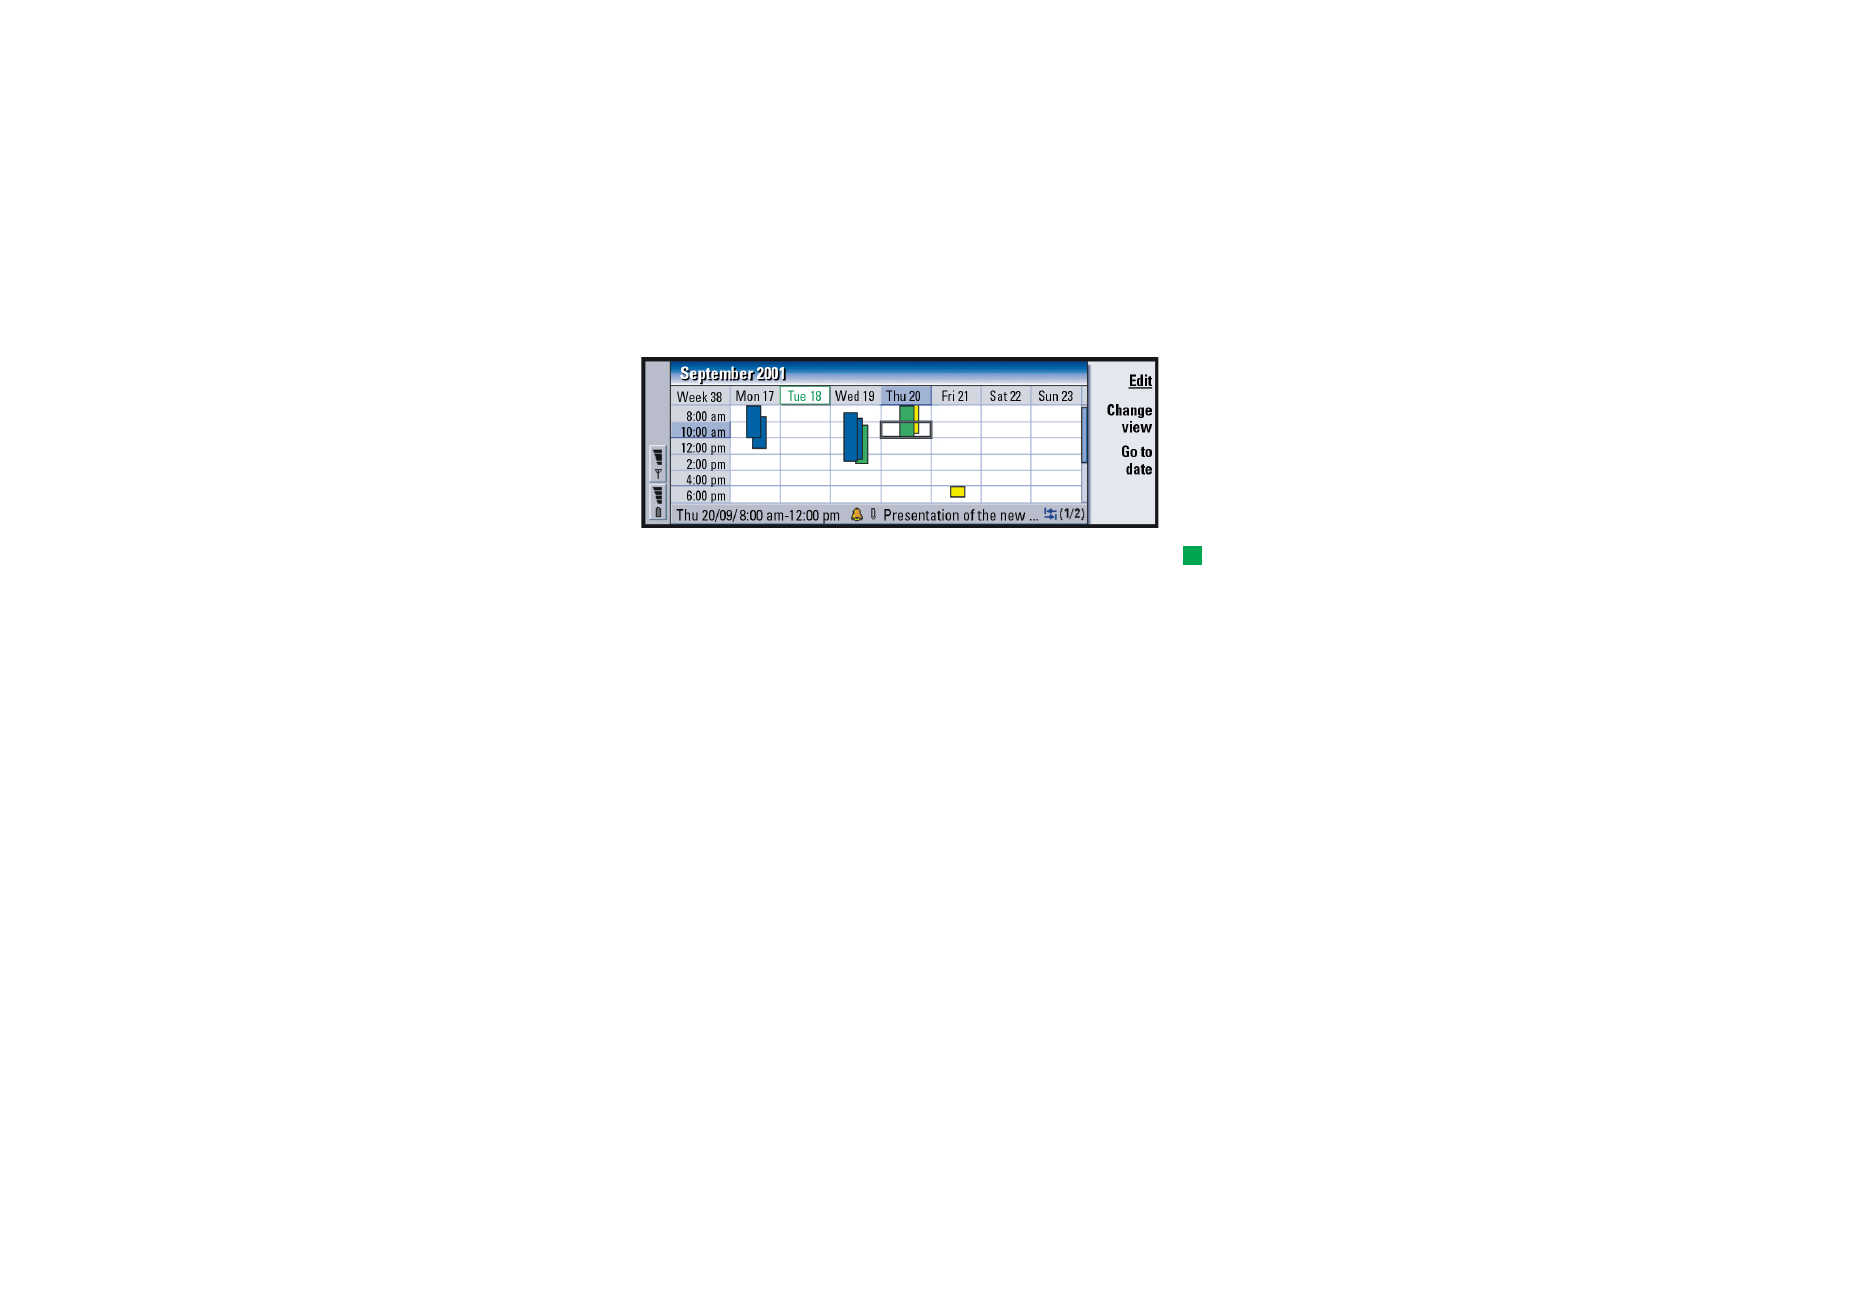
Figure 47
Tip: You can select
different bar colours for
different types of entries.
See ‘Status page’ on page
117.
The weekly time schedule shows the reserved hours for the selected week. This
means that only timed entries are shown The currently selected time box is framed.
Entries are marked with bars.
Example: Use a green bar
for hobbies and a red bar for
business trips to get a quick
overview of your activities
during a week. See ‘View
settings’ on page 131.
If a time box contains entries, the bar across the bottom of the weekly time
schedule shows the details of the entry. The numbers to the right of the entry
description indicate the number of entries contained in that time box. For example,
1/2 in Figure 47 means that you are seeing the details of the first of two entries.
If a time box contains more than one entry, you can view a list of the entries by
pressing the Tab key.
©2001 Nokia Mobile Phones. All rights reserved.
126
Calendar
Year schedule
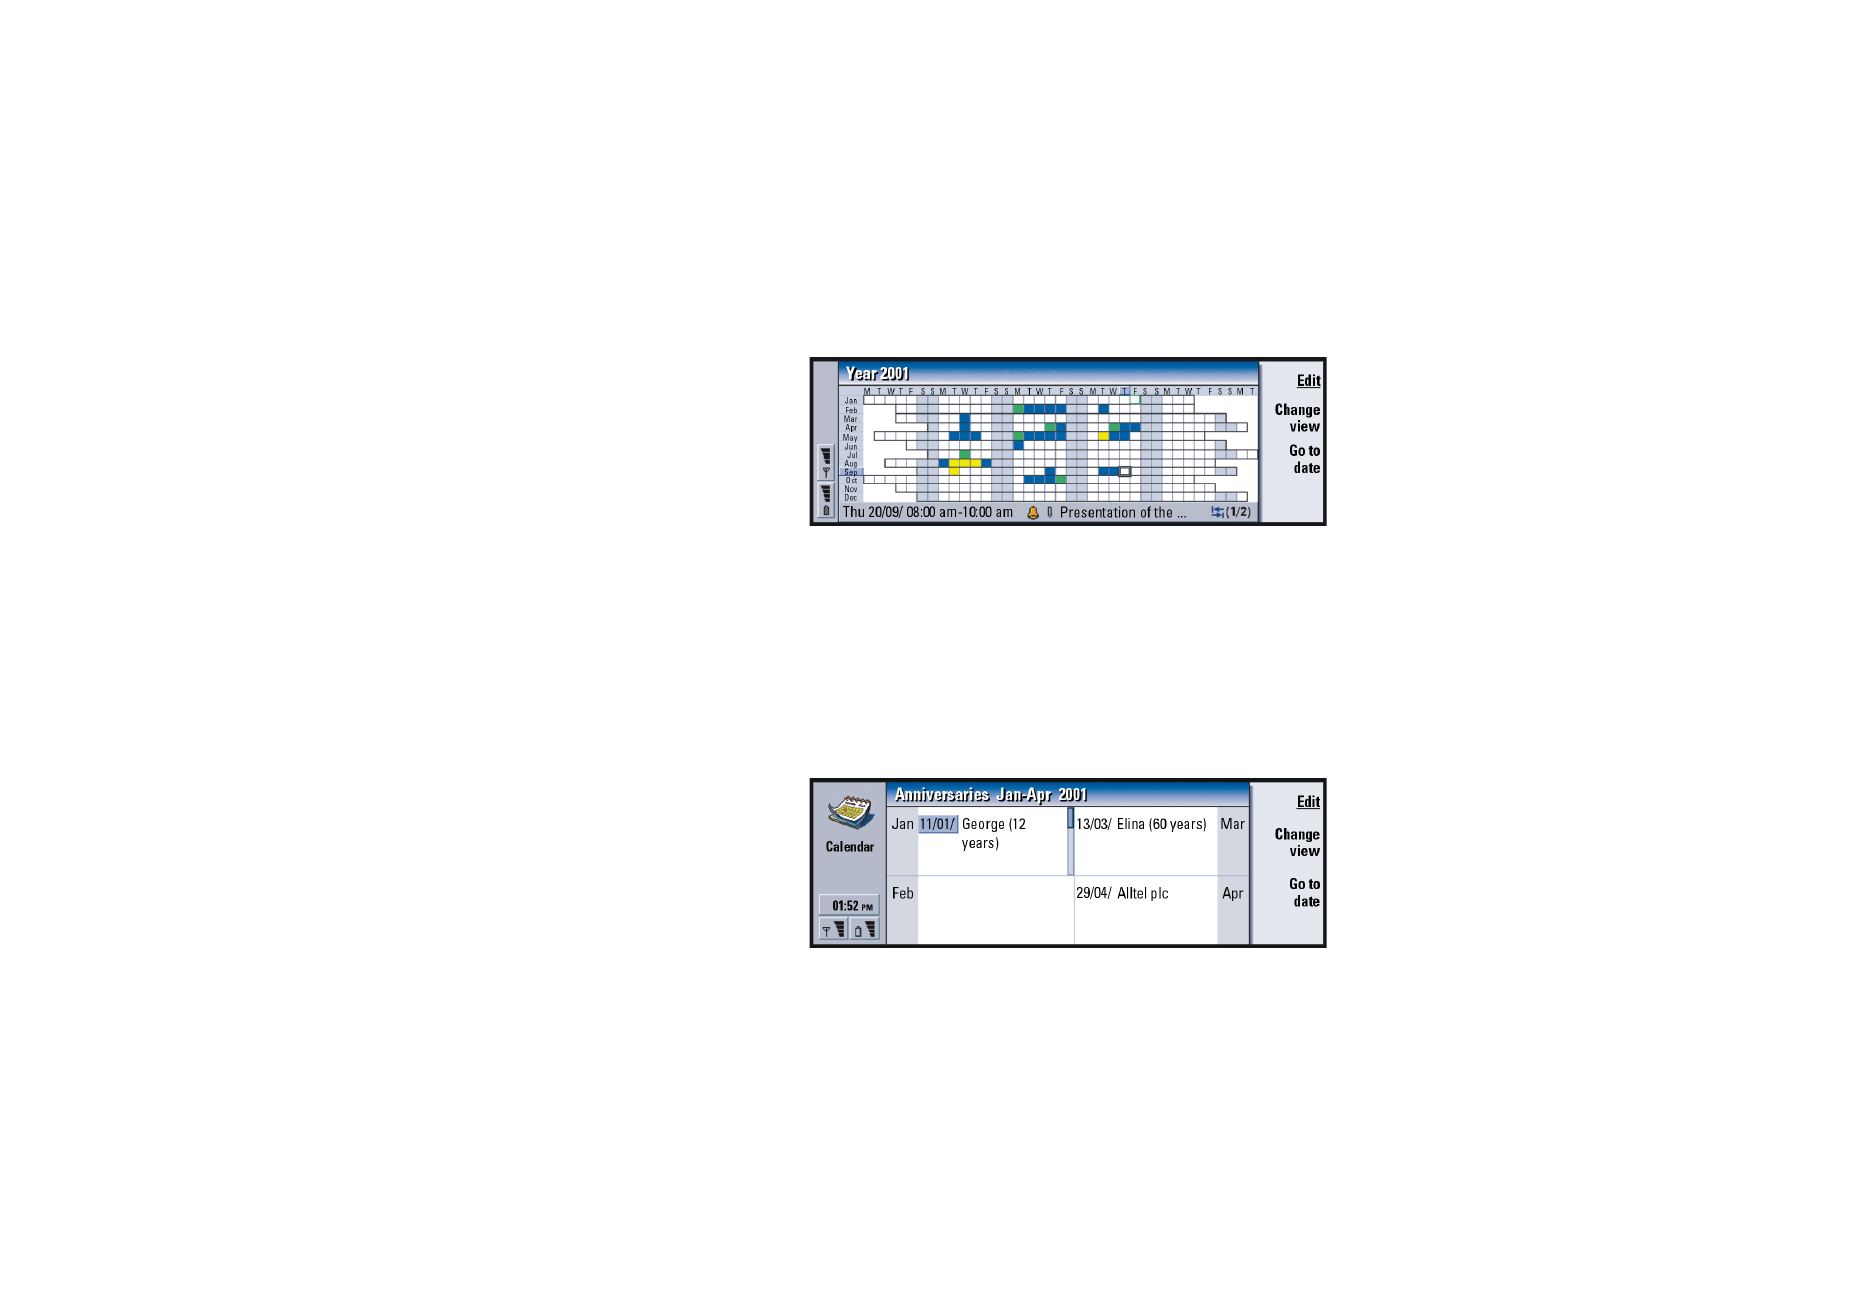
Figure 48
The year schedule shows the timetable for the selected year. Only entries with
colours are shown in the year schedule. If there are several colours connected to
the day, only one can be shown.
Abbreviations for the days of the week are in the highest row and the months of
the year in the far left column.
Time boxes have the same functions as in the Weekly time schedule.
Anniversaries
Figure 49

©2001 Nokia Mobile Phones. All rights reserved.
127
Calendar
Tip: To change the
number of months shown in
the anniversary view, press
the Menu key and select
View > View settings…. See
Months in view in ‘View
settings’ on page 131.
The anniversary view shows the anniversaries for four months at a time. You can
add here all the birthdays and other anniversaries that you want to be reminded of.
Note: Only anniversary entries are shown in the anniversary view.