
Calendar entries
There are four types of entry that you can store in the Calendar application:
Example: Use appointment
entries for meetings and
business lunches.
• Appointment entries are the basic entries in your calendar .
• Event entries are related to the whole day, not to a specific time of day. Event
entries do not appear in the Weekly time schedule.
• Anniversary entries are repeated annually on the same date. Use Anniversary
entries for annual reminders of important dates, such as birthdays or
celebrations.
Tip: To move or copy
entries in Day view, cut it to
the clipboard with Ctrl + X,
and paste it to the new
starting time with Ctrl + V.
• Task entries are for writing down tasks. These tasks can then be prioritised and
organised into task lists. To-do tasks can also have deadlines.
There are also seven different views to view entries. Press Change view to choose
a view. For more information about different views, see ‘Views’ on page 120.
©2001 Nokia Mobile Phones. All rights reserved.
114
Calendar
To create new calendar entries
There are two ways to create calendar entries:
Tip: To send a calendar
entry to reserve a time in
other device calendars,
move to the date that
contains the entry with the
Arrows key, press the Menu
key and select Send > As a
short message or Via infrared
• Start typing your entry. As you enter characters, Calendar opens the default
entry dialog of the current view.
• Press the Menu key and select File > New entry. Select the entry you want to
create. The options are: Appointment…, Event…, Anniversary…, or Task….
This is the way to create a new calendar entry when you do not want to use the
default entry type for the particular view.
To define information in a calendar entry
Tip: To change the
default values of an entry
details dialog, press the
Menu key and select Entry >
Default settings.
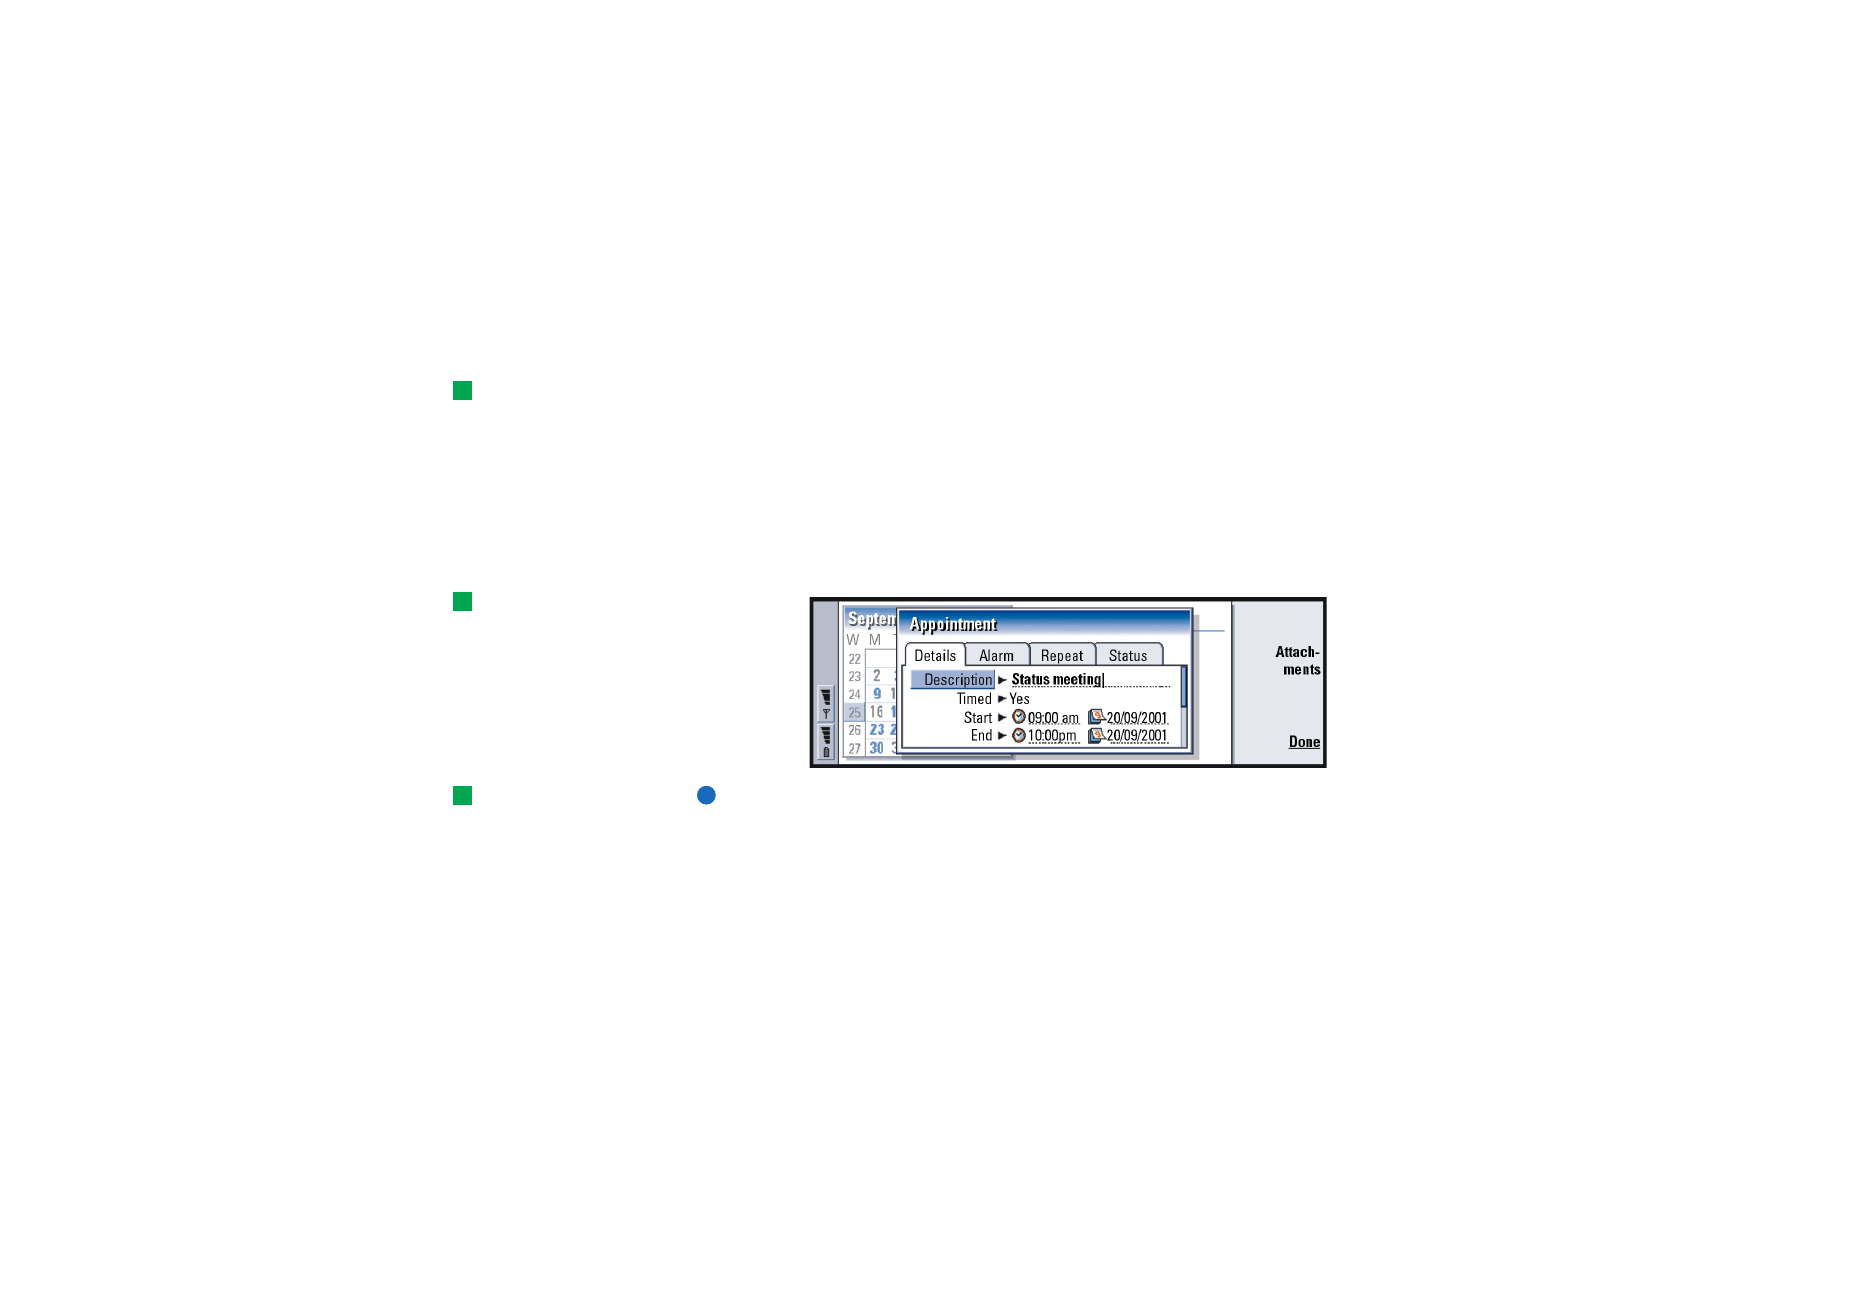
Figure 40
Tip: To see how
attachments are created
and copied to an entry, see
page 120.
Note: The contents of an entry dialog vary according to the entry type; that is,
if it is a day, event, anniversary, or task entry. The following descriptions
of each dialog page list all the possibilities.
Details page
Description: The description of the entry.

©2001 Nokia Mobile Phones. All rights reserved.
115
Calendar
Tip: An untimed entry is
displayed with a
icon.
Timed: Specifies whether a day entry is timed or untimed. ‘Timed’ means that the
entry has a specific start time, end time, and duration. ‘Untimed’ means
that the entry happens on a particular date, but at no specific time. If you
select No, you may have to define the date for the day entry in the field
below. If you select Yes, you must define the starting and ending time.
Date:
The date of the entry.
Start:
The time or date when the entry starts, depending on the entry type.
Example: The start year may
be a person’s year of birth,
and the number of years
since the start year may be a
person’s age.
Display year: Displays the start year of the anniversary, the number of years that
have passed since the start year, or no year information. The options are
Starting year/In number of years/None.
Duration: The duration of the entry. If you change the value in the Start and End
fields, this field is updated.
End:
The time when the entry ends.
Priority: The priority of a task. The options are High/Normal/Low.
Task list: The task list to which the task entry is connected.
Due date: The deadline of a task.
Start warning: The days before the due date when a task starts being shown in
today’s entry list.
Alarm page
Tip: You can set an alarm
for a task entry only if you
have also set a Due date.
Set alarm: Specifies whether an alarm is set for the entry.
Time before: The time when an alarm set for a timed day entry will go off.
Alarm time: The time when an alarm set for an untimed entry will go off.
Days before: The number of days before an entry when an alarm will go off.

©2001 Nokia Mobile Phones. All rights reserved.
116
Calendar
Repeat page
Example: If your club has a
meeting which takes place
on the first Monday of every
month, you can set the entry
to recur accordingly by
selecting Monthly by day.
On this page you can determine whether and when you want an entry to be
repeated:
Repeat type: The repeat type for the entry. The options are No repeat/Daily/Working
days/Weekly/Monthly by day/Monthly by date/Yearly by day/Yearly by date.
Note: Define Repeat type first since the choice of options in the rest of the fields
depends on what you have selected.
Repeat on days: The days on which the entry is repeated. Use the Arrows key to
go to a day you wish to select and press Select. You can select more than
one day at a time. See Figure41.
Figure 41
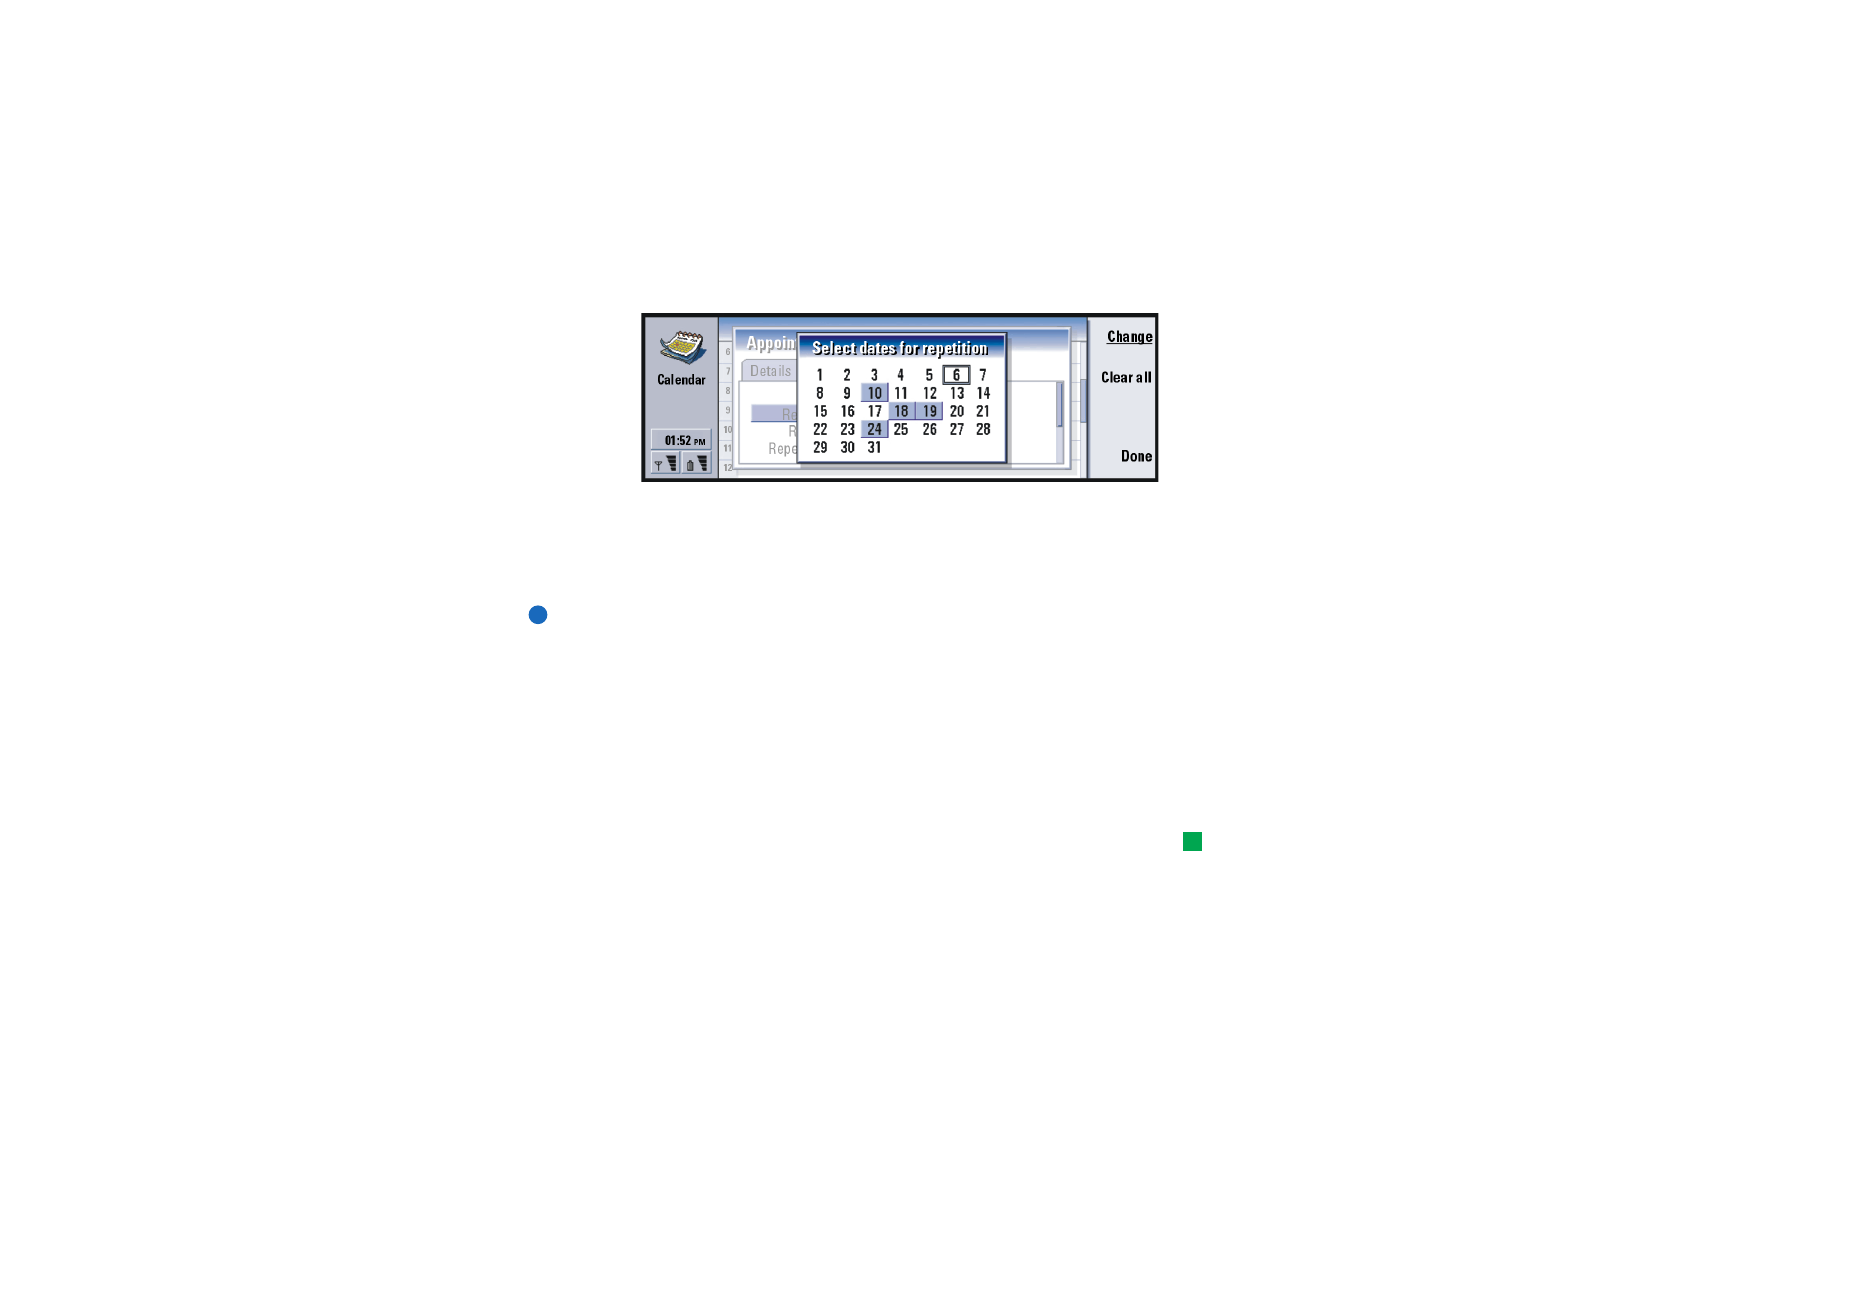
Repeat on dates: The dates on which the entry is repeated. Use the Arrows key to
go to a date you wish to select and press Select. You can select more than
one date at a time. See Figure 42.
©2001 Nokia Mobile Phones. All rights reserved.
117
Calendar
Figure 42
Example: To define an entry
that is repeated Daily with
two days between every
repeat, define “every 3 days”
in Repeat interval.
Repeat interval: The time period between repeats. This option is available if you
have selected Daily, Weekly, Monthly by day, or Monthly by date in Repeat
type.
Repeat indefinitely: Frequency of the repetition. The options are Yes / No.
Note: It is still possible to remove or edit a single entry even if the entry is
repeating. If you edit an entry and change any options except the repeat
options, a selection list appears. You then choose how you want the
change to take place from the following options: All occurrences/Only this
occurrence/This and future occurrences/This and past occurrences.
Status page
On this page you can define a background colour and status for the entry, as well
as specify whether you want to synchronise the entry:
Tip: Colour is a handy
way to categorise entries -
you see more easily how
your time is reserved.
Colour marking: A colour for the entry symbol which appears after the text of the
entry in all views. When you check your calendar entries in the Weekly
time or Year schedules, the colour is used for the bar indicating the entry.

©2001 Nokia Mobile Phones. All rights reserved.
118
Calendar
Example: If you are not sure
if a entry will take place, you
can mark it as Tentative.
Tentative: Whether an entry is confirmed or not.
Crossed out: Whether an entry has been completed or not. Crossing out an entry
does not remove it from the calendar.
Synchronisation: Whether your calendar entries are shown to others when you
connect to the network and synchronise your calendar. The options are
Public, Private, and No synchronisation. See the PC Suite Guide on the CD-
ROM for more information about synchronisation.
To edit an entry
1 Select the entry in the view.
2 Press Enter. A details dialog for the entry opens. Edit the details on the various
pages.
You can now, for example, reset the alarm or redefine how the entry is repeated
in the calendar. See ‘To define information in a calendar entry’ on page 114.
To change an entry type
Example: You might have
entered an event, but you
now want to change it to an
appointment.
1 Select the entry in the view.
2 Press the Menu key and select Entry > Change entry type….
3 Choose from the following options: Appointment/Event/Anniversary/Task.

©2001 Nokia Mobile Phones. All rights reserved.
119
Calendar
Tip: To change the
default entry type of a
particular view, press the
Menu key and select View >
View settings…. See Default
entry type in ‘View settings’
on page 131.
To delete entries
It is advisable that you tidy up your calendar from time to time by deleting entries,
since calendar entries accumulate over time and consume memory.
Note: You can also back up your calendar data to a compatible PC. See the PC
Suite Guide on the sales package CD-ROM for details.
To delete a single entry
Tip: The shortcut to
delete a single entry is to
select it and press Ctrl + D.
• Select the entry or entries in the view, then press the backspace key. A note is
displayed asking you to confirm the deletion; or
• Select the entry or entries in the view, press the Menu key, and then select File
>Delete entry. To confirm the deletion, press OK.
To delete a range of entries using defined criteria
Tip: You can move entries
to another file and then to a
PC to free up memory.
1 Press the Menu key and select Tools > Move/Delete…. A dialog box is displayed
with a suggested range of entries to be deleted.
2 Press OK to delete all the entries defined in the dialog box at step 1, or press
Options to define further criteria (including whether you want to ‘move’ or to
‘delete’. A dialog with two pages opens. Define the following and press Done to
return to the previous dialog.
Details page
Action: The consequences of removing the entries. The options are Delete/Move
to a file.
Entries: The types of entries which will be removed. The options are All/Crossed out.
Time period: The time scope of the removal. The options are Whole calendar/Until
today/From today/Other.

©2001 Nokia Mobile Phones. All rights reserved.
120
Calendar
Start:
The start date of the entries to be removed.
End:
The end date of the entries to be removed.
Entry types page
Choose from the following options: Appointments/Events/Anniversaries/Tasks.
To view, create, and delete attachments
1 Open a calendar entry by pressing Enter. The entry details dialog with four
pages opens.
2 Press Attachments. A selection list of attachments linked to the calendar entry
opens.
3 To view a selected attachment, press Open.
To create a new attachment, press New.
To delete an attachment, press Delete.