
Sheet
In Sheet you can work and store your data in a file that is called a workbook. Each
workbook contains at least one worksheet. A workbook can also contain
chartsheets; a chartsheet is a spreadsheet file containing a chart that is based on
data from a worksheet.
Sheet can open files created with recent versions of Microsoft Excel for Windows.
Note that not all features and formatting of the original files will be supported.
Files made with other versions of Microsoft Excel may only be viewed. You can also
save files made with the communicator in Microsoft Excel format. For information
on other file format conversions, see the PC Suite guide on the CD-ROM.
Note: For information on compatibility with Microsoft Excel, see the CD-ROM
in the sales package.
Workbooks
Tip: To add a workbook to
the Desk application, press
the Menu key and select File
> Add to Desk.
To create a new workbook, press the Menu key and select File > New workbook.
To open an existing workbook, press the Menu key and select File > Open.
To save a workbook, press the Menu key in the worksheet view and select File >
Save.
©2001 Nokia Mobile Phones. All rights reserved.
193
O
ffi
ce
To send a workbook as mail or via infrared, press the Menu key in the worksheet
view and select File > Send.
Worksheets
To create a new worksheet in a workbook, press the Menu key and select Insert >
New worksheet.
To enter data
To enter data, select a cell with the Arrows key and start typing the data in the
selected cell.
To confirm what you have entered into a cell, press Enter, OK, or go to another cell
with the Arrows key. To dismiss the action, press Esc or Cancel.
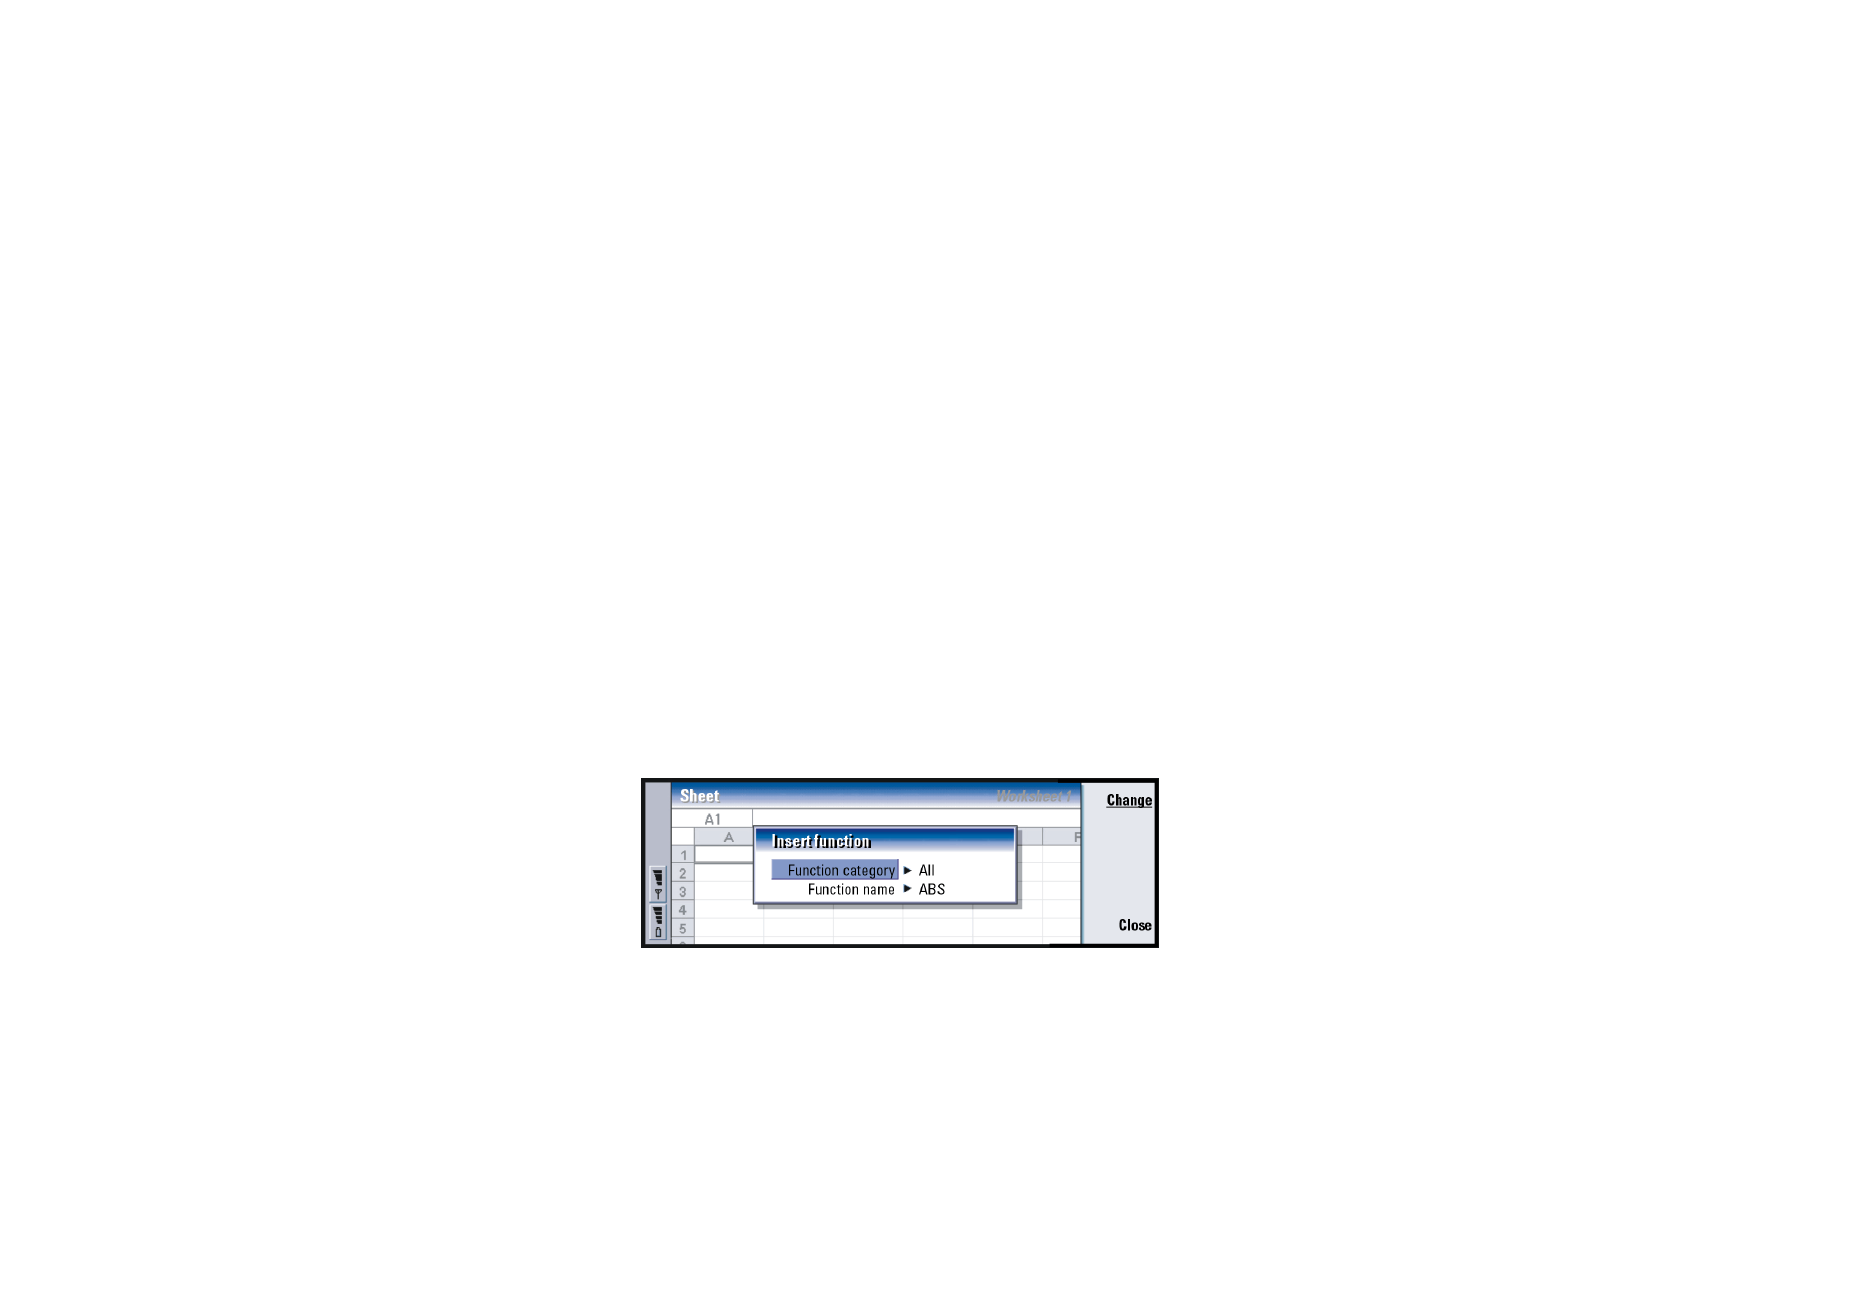
To determine the category to which you want the data in the cell to belong, press
Function. The categories are as follows: All, Financial, Date and time, Mathematical,
Statistical, Lookup, Text, Logical, and Information. Each category has a set of
functions, which you can see from the list next to Function name. See Figure 77.
Figure 77
©2001 Nokia Mobile Phones. All rights reserved.
194
O
ffi
ce
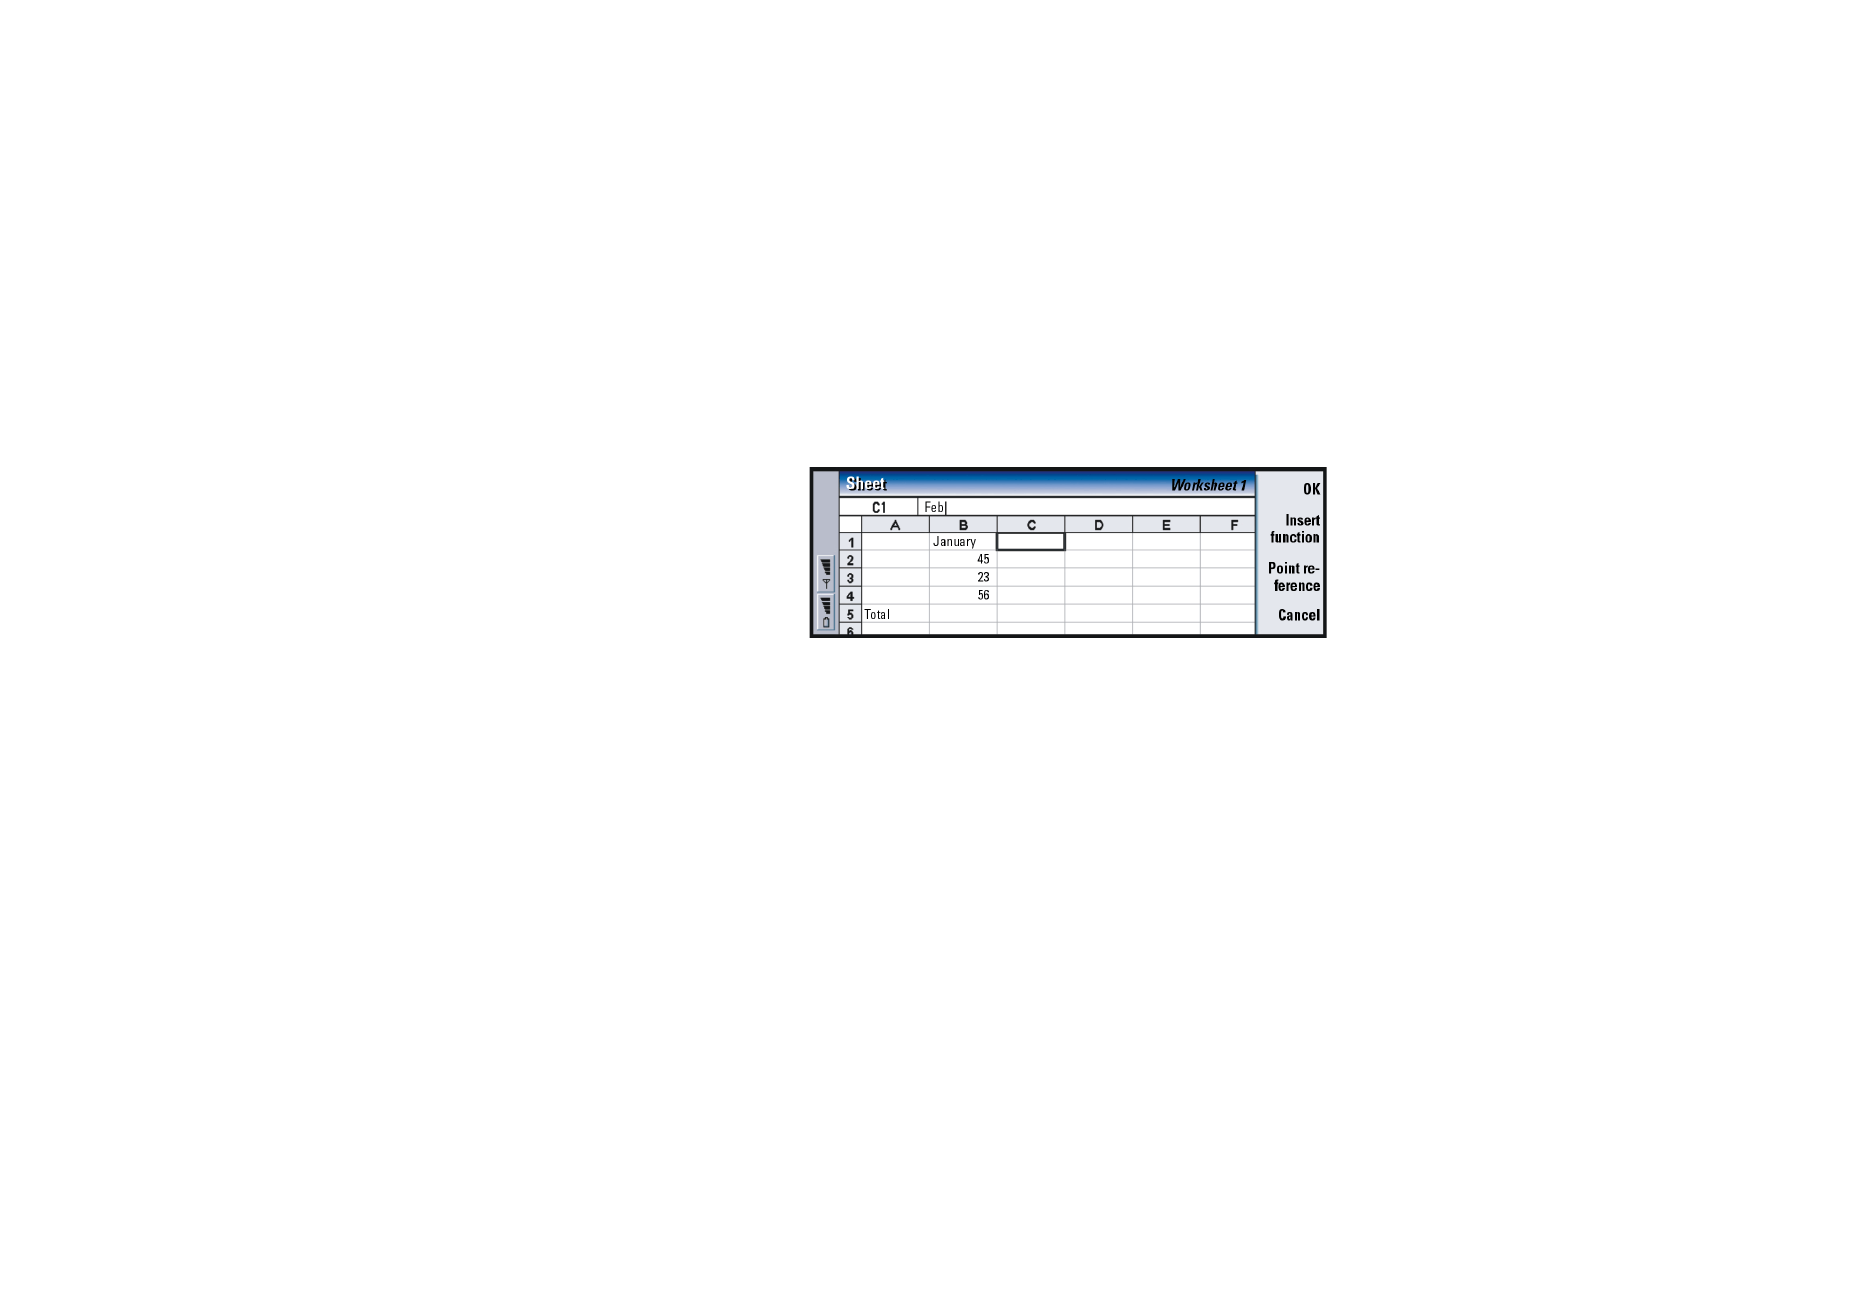
Example: You might want
to sum up figures in cells C2
to C4 in cell C5; select cell
C5, press Point reference
and select the cell range
from C2 to C4. Press Enter or
OK to confirm the action.
The SUM will now appear in
C5.
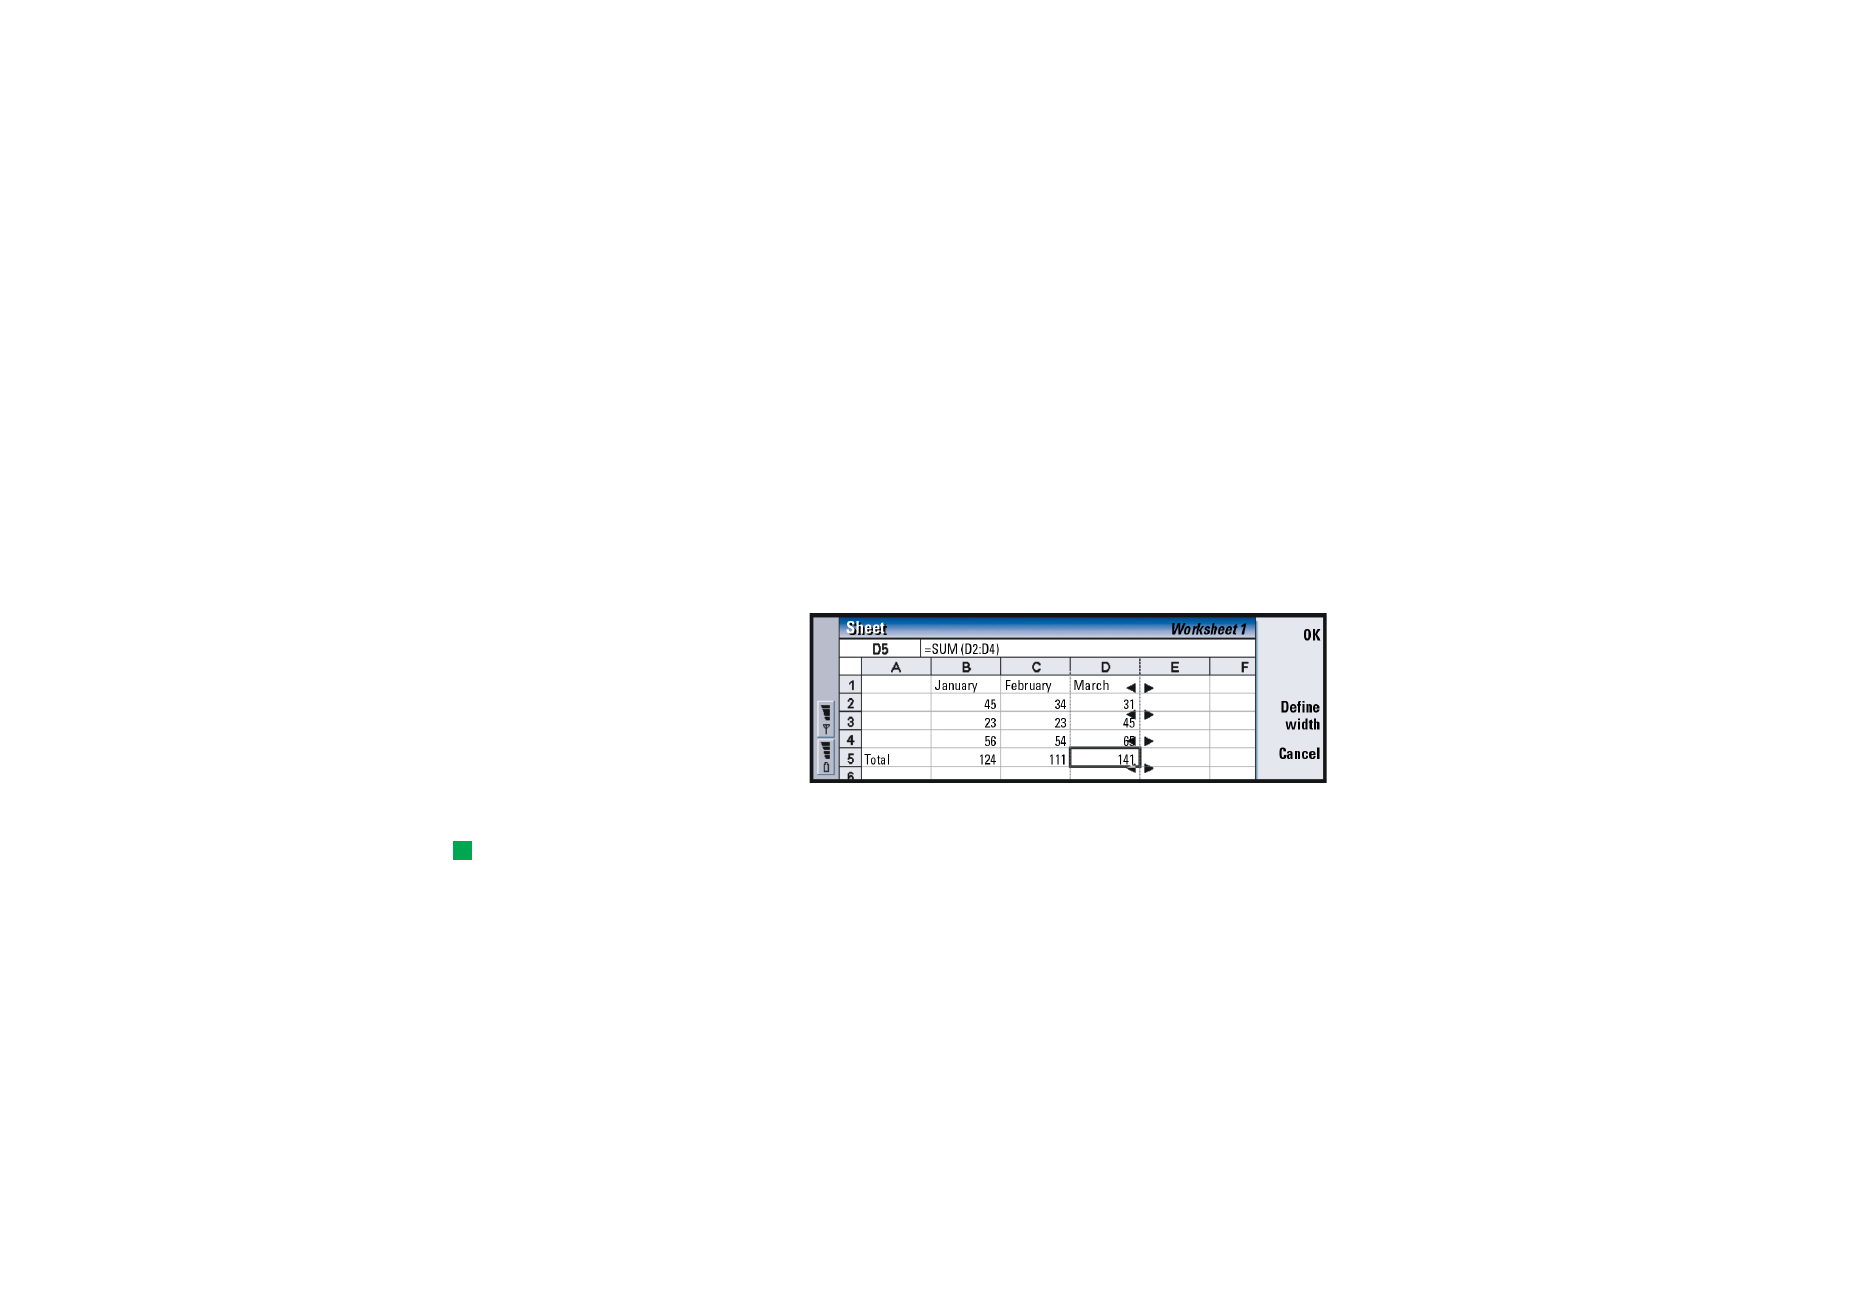
You can also choose a cell or cells as reference for a function in the cell you are
editing:
1 Press Edit and Point reference.
2 Select the cells that the function cell refers to. See ‘To select cells’ on page 194.
The focus remains in the cell you are editing.
3 Press Enter or OK to confirm the action. See Figure 78.
Figure 78
To select cells
There are two ways to select a cell or a range of cells in a worksheet:
Example: To select column
A, enter A:A. To select row 1,
enter 1:1. To select columns
B and C as well as rows 2
and 3, enter B2:C3
• Press the Menu key and select Edit > Select. Then enter the selection range or
choose a range from the list.
• Press and hold the Shift key, and increase the selection frame with the Arrows
key.
To select entire rows or columns, press and hold the Shift key, and select the
desired row or column headings with the Arrows key.
To select the entire worksheet, use the shortcut Ctrl + A.
The selection is cleared when you press the Arrows key or Tab key.

©2001 Nokia Mobile Phones. All rights reserved.
195
O
ffi
ce
To insert cells
1 Select a number of cell(s) that you want to insert into the worksheet.
2 Press the Menu key and select Insert > Cells. A dialog opens.
3 Define whether you want the inserted cell or cells to appear above (Shift cells
down) or left (Shift cells right) of the selected range.
To insert an entire row(s) or column(s), select either Entire row or Entire column.
4 Press OK to accept the insertion and Cancel to dismiss it.
To sort cells
You can rearrange the order of cells from top to bottom and left to right.
1 Select the range.
2 Press the Menu key and select Tools > Sort.
3 Then select either Top to bottom or Left to right. A dialog with the relevant
number of pages opens.
4 Define the sorting criteria.
5 Press Close to do the sorting.
To search for data
1 Press the Menu key and select Edit > Find. A dialog opens.
2 In the Find: field, enter the string you want to search for.
Tip: Pressing Options
opens up the following
options: Search in values,
Search in formulae, Match
case, Find entire cells only,
Direction, and Search by.
3 Press Find to search for the string.
Press Options to search the worksheet according to certain criteria.
Press Replace to replace the string with something else.
To clear cells
1 Choose the cell or cells you want to clear.
2 Press Clear. A lists of choices appears.
©2001 Nokia Mobile Phones. All rights reserved.
196
O
ffi
ce
3 To clear both the contents and formats of the cell or cells, select All.
To clear only the contents of the cell or cells, select Contents.
To clear only the formats of the cell or cells, select Formats.
To adjust column width or row height
1 Select the column(s), or row(s).
2 Press the Menu key and select Format > Column width… or Row height….
3 To increase column width, press > on the Arrows key as many times as
necessary. To diminish column width, press <.
To increase row height, press
∨
on the Arrows key as many times as is necessary.
To diminish row height, press
∧
.
To adjust the width or height by exact figures, press Define width.
Figure 79
To align cell contents
Tip: To confirm the
changes you do, press Select
or OK. To dismiss the
changes, press Cancel or
Esc.
1 Select the cell or cells.
2 Press the Menu key and select Format > Alignment. A dialog opens.
3 Define the following options: Horizontal, Vertical, and Wrap text to cell.
To change the appearance of cell borders
1 Select the cell or cells.

©2001 Nokia Mobile Phones. All rights reserved.
197
O
ffi
ce
2 Press the Menu key and select Format > Cell appearance > Borders. A dialog
opens.
3 Define the following options: Outline, Top, Bottom, Left, Right, and Line colour.
To change number format
1 Select the cell or cells.
2 Press the Menu key and select Format > Numbers. A dialog opens.
3 Choose the required format from the list. Depending on the format you choose,
you may define the place of the decimal.
To change fonts
1 Select the cell or cells.
2 Press the Menu key and select Format > Font. A dialog opens.
3 Press Change to change the value of a list item.
4 To see the effect of the changes you have made, press Preview.
5 Press Done to save the changes you have made.
To change background colour
1 Select the cell or cells.
2 Press the Menu key and select Format > Cell appearance > Background colour. A
dialog opens.
3 Choose the colour.
To insert page breaks
1 Press the Menu key and select Insert > Page break. A dialog opens.
2 Define the following options: Break at column and Break at row.

©2001 Nokia Mobile Phones. All rights reserved.
198
O
ffi
ce
To name cells
Tip: To change viewer
preferences, press the Menu
key and select Tools >
Settings. Set the following
options on or off: Show
gridlines, Show row headers,
Show column headers,
Automatic recalculation,
Show zero values, and Show
pagination lines.
1 Select the cell or cells.
2 Press the Menu key and select Insert > Name > Add. If the cell or cells already
have a name, you can edit the name by selecting Edit. A dialog opens.
3 Enter the name.
To name worksheets
1 Press the Menu key and select Edit > Rename worksheet. A dialog opens.
2 Choose the worksheet from the list and name it.
To delete cells, columns, rows, page breaks, and worksheets
1 Press the Menu key and select Edit > Delete. A dialog opens.
2 Choose from the list what you want to delete.
To go to any sheet or chart within the same workbook
Tip: To view sheets in the
Chartsheet view, press
Sheets/ Charts.
1 Press the Menu key and select View > Worksheets. A list of sheets opens.
2 Choose a sheet and press OK to open the sheet and Cancel to dismiss it.
Note: You cannot change the order of the sheets.
Chartsheets
To create chartsheets
There can be seven different kinds of charts: Line, Column, Stacked column, Bar,
Stacked bar,X/Y scatter, and Pie.
1 Select a range of cells on a worksheet. These will provide the data for your new
chartsheet.
©2001 Nokia Mobile Phones. All rights reserved.
199
O
ffi
ce
2 Press the Menu key and select Insert > New chart. A dialog opens.
3 Define the following: Chart name, Chart type, 3-D, Background colour, and Axis
colour.
4 Press Close to create a new chartsheet and Esc to dismiss it.
Note: You can create a chartsheet without basing it on a worksheet, but this
requires you to define the data for the x and y-axis manually.
To edit chartsheets
Tip: You can also press
the Tab key and Enter to
select objects. Press Esc to
cancel the selection.
1 Press Select object. A dialog opens.
2 Choose an object from the following list for editing and press OK: Chart, Chart
title, X-axis,Y-axis, X-axis title, Y-axis title, Legend, Major X-axis gridlines, Minor X-
axis gridlines, Major Y-axis gridlines, Minor Y-axis gridlines, and Series.
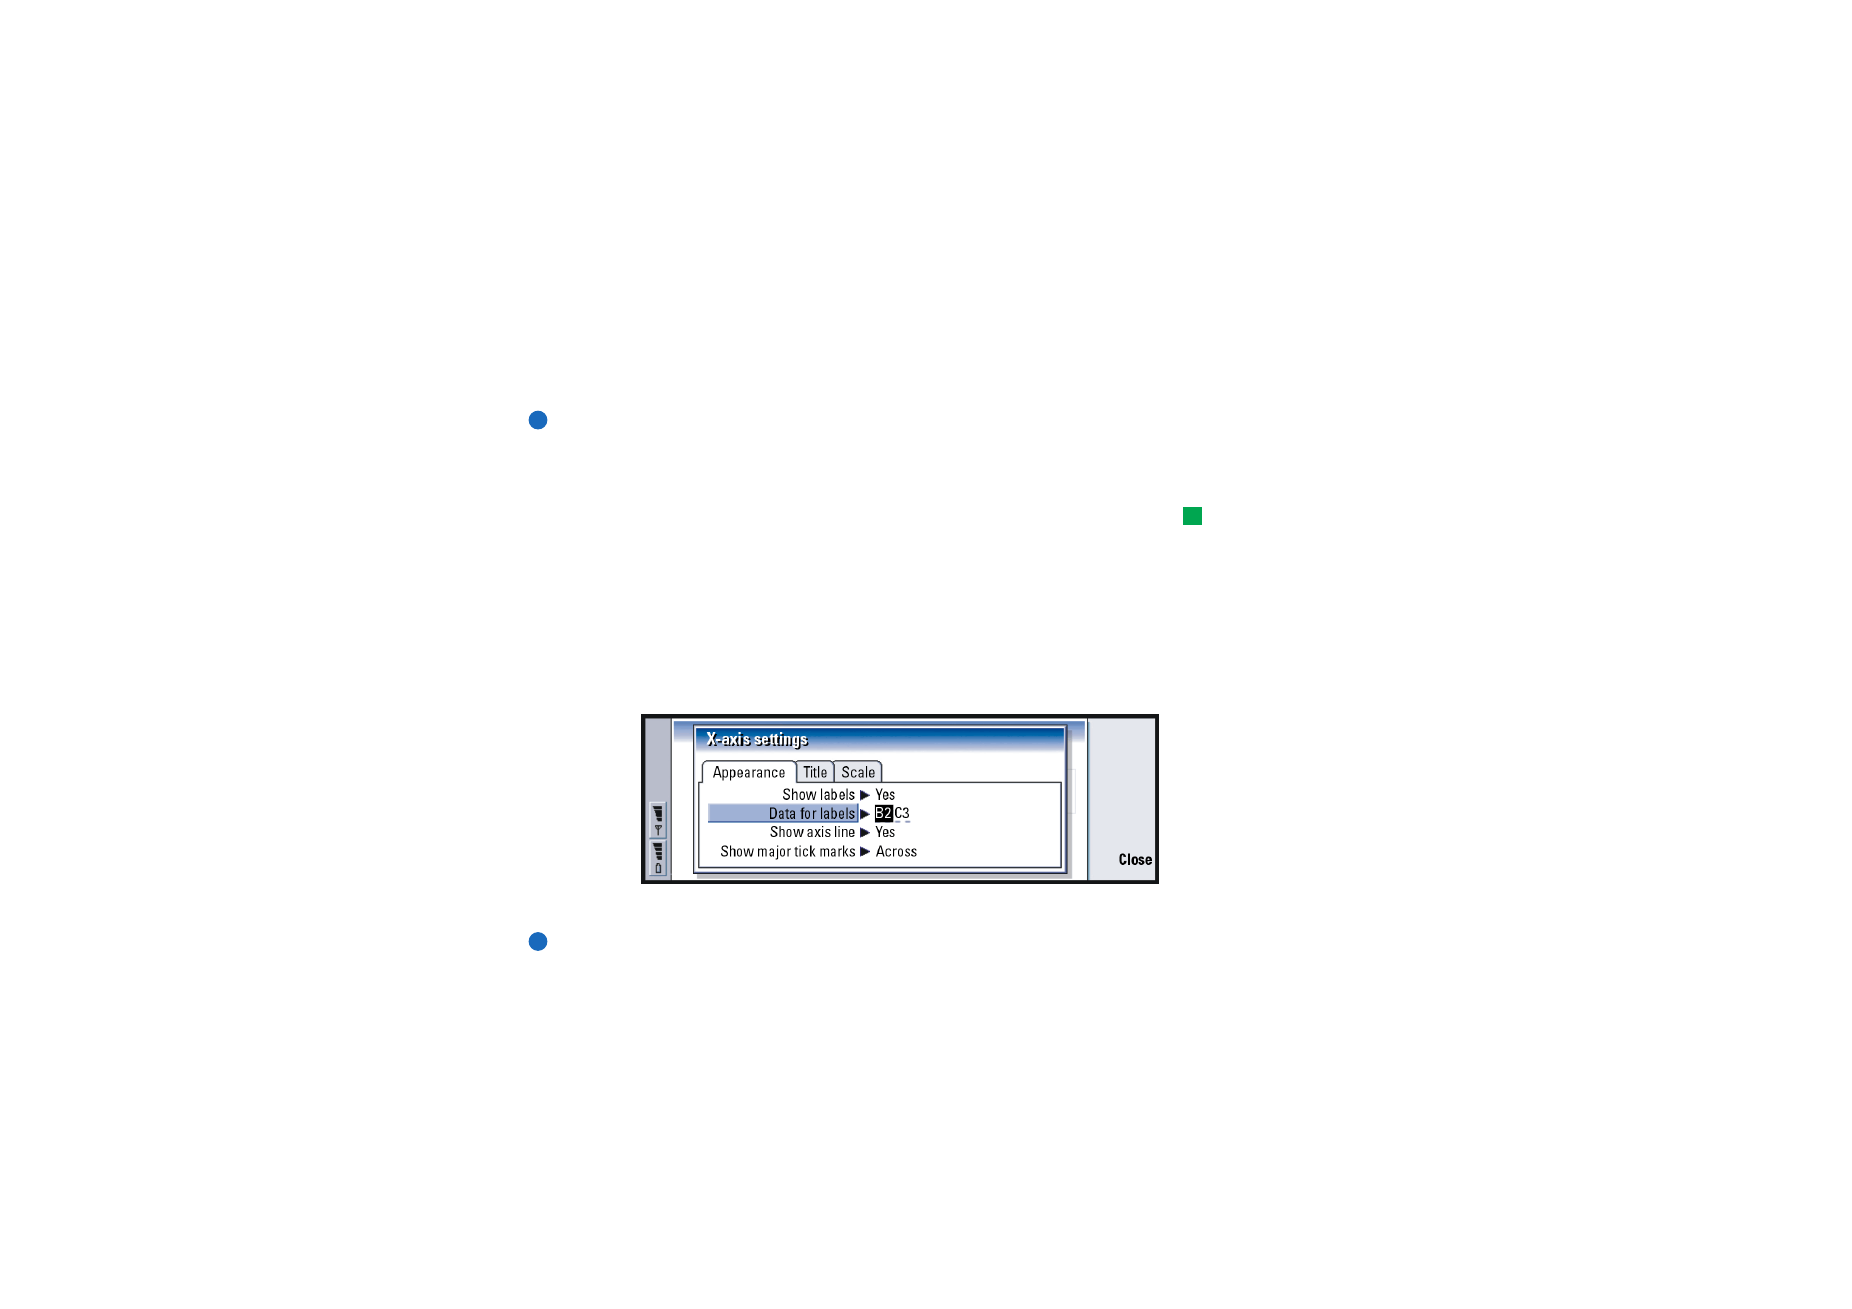
3 To edit the object, press Change or press Enter. A dialog opens.
To delete the object, press Delete.
4 Define the new values. See Figure 80 for an example of X-axis settings being
edited.
Figure 80
5 Press Close to confirm the changes and Esc to dismiss them.
Note: You can select only one object at a time.

©2001 Nokia Mobile Phones. All rights reserved.
200
O
ffi
ce
To replace chartsheet data
Tip: To edit page details,
press Chart settings. Define
the page style and name in
the two pages of the dialog
which opens.
You can replace the data on which your chartsheet is based.
1 Press Sheets/ Charts and select the worksheet your chart is based on.
2 Select a new data area for the chart from the worksheet, press the Menu key,
and select View > Sheets/Charts… to return to the chartsheet.
3 Press the Menu key, select Tools > Replace data, and press OK to confirm the
changes and Cancel to dismiss them.